
A dishwasher washes dishes every day, but that doesn't mean it stays clean on its own. Over time, food particles, grease, detergent residue and mineral buildup can collect around the filter area, along the bottom of the tub and around the door edges. When that happens, you might notice gritty glasses, a film on the interior or a smell that wasn't there before.
The good news is that cleaning a dishwasher doesn't mean taking the appliance apart. For most machines, routine care means checking the parts you can reach, cleaning the filter where your model has one that is meant to be cleaned, and following the manufacturer's instructions for the interior.
This guide walks through how to clean a dishwasher safely, including the filter, interior, spray arms and door seals, along with the precautions that matter most when it comes to vinegar and other cleaners. Dishwashers vary quite a bit by brand and model, so the steps below are a general framework rather than a one-size-fits-all procedure.
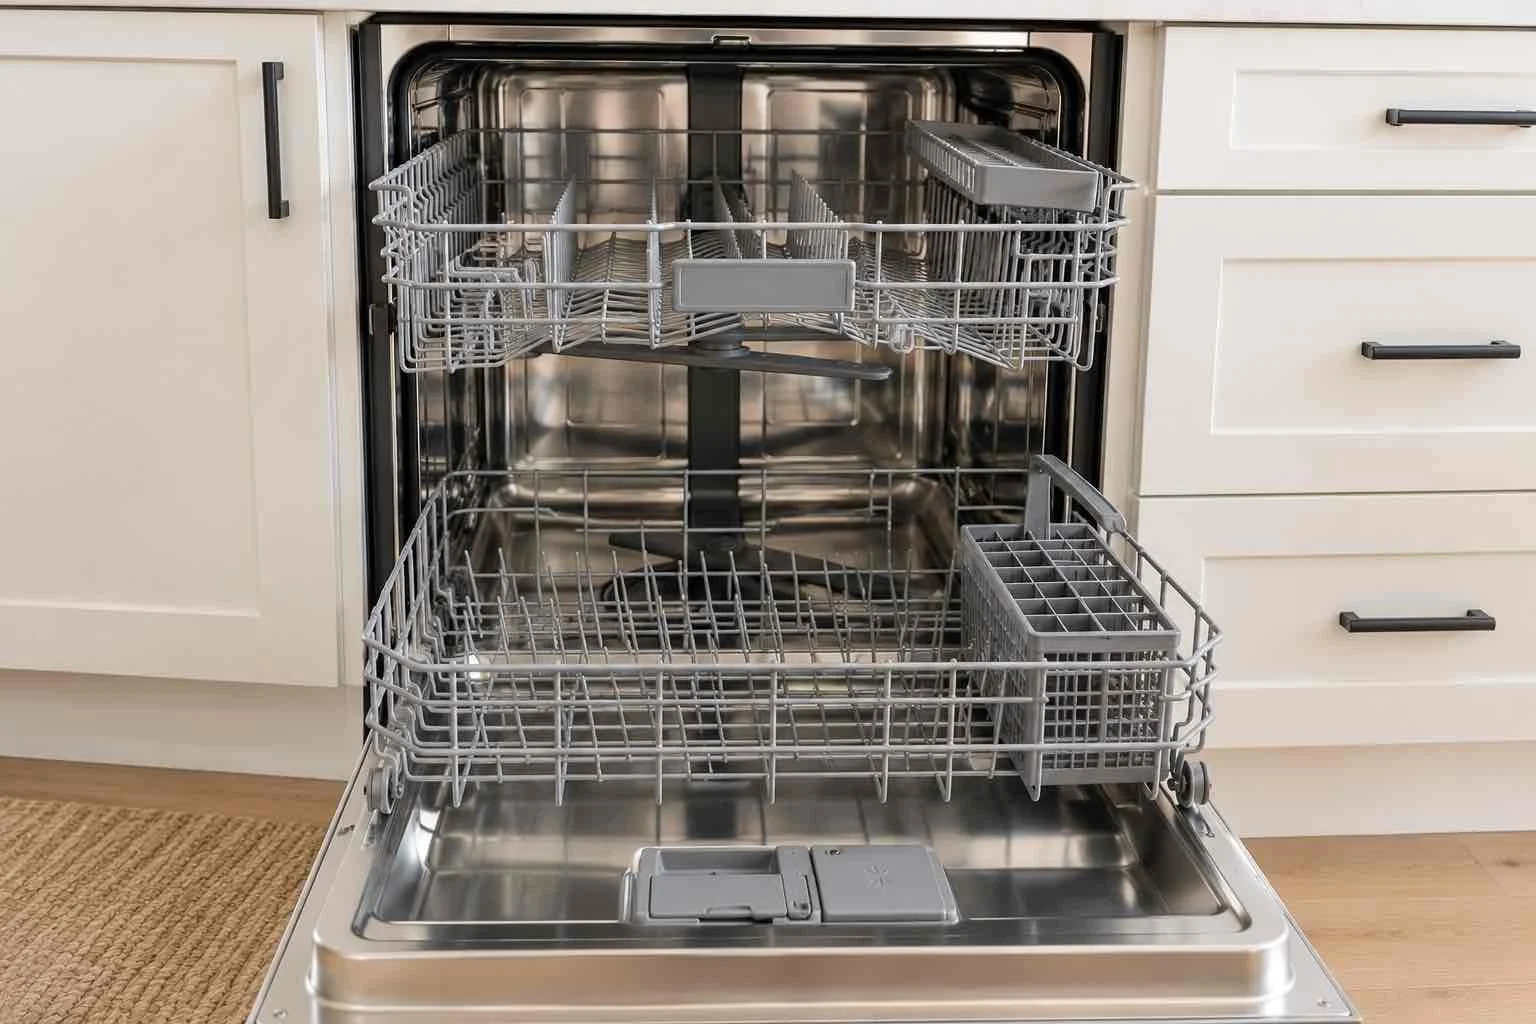
Before You Clean Your Dishwasher, Check the Manual
It's tempting to skip straight to the scrubbing, but the owner's manual is the most useful tool you have here. Dishwashers are not built the same way, and the manual tells you what applies to your machine. Before removing any part or using a cleaner, look for answers to these questions:
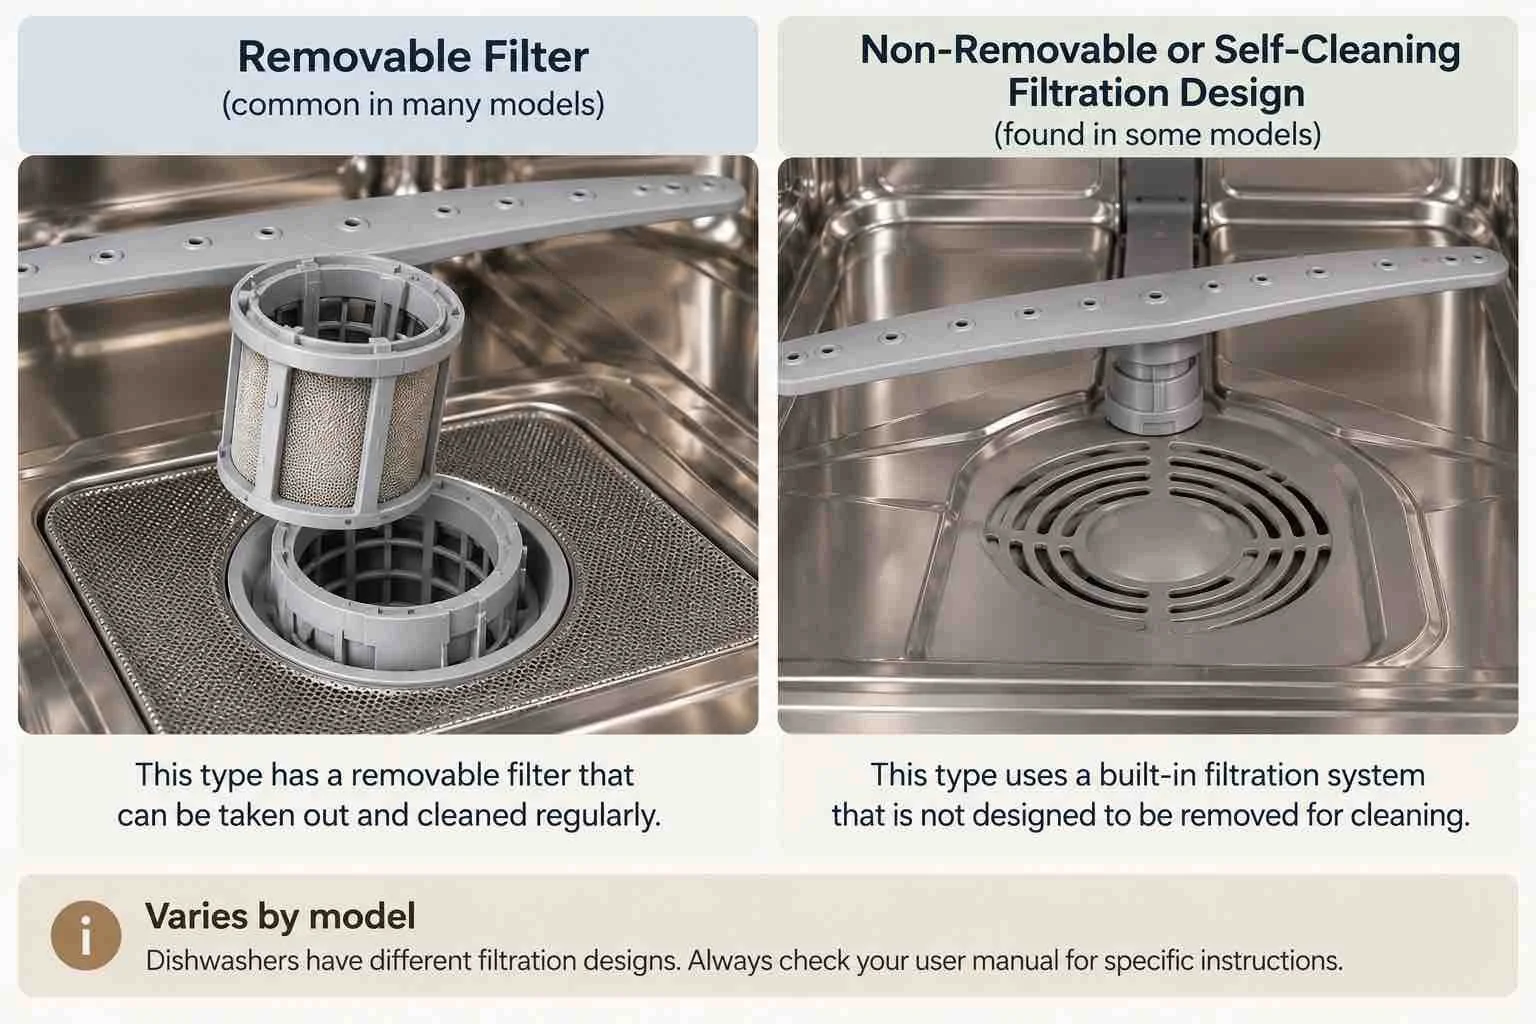
Is the filter removable? Some dishwashers have a manual-clean filter you can lift out. Others use self-cleaning or non-removable filtration.
How is the filter removed? Methods differ by model, and forcing a part the wrong way can damage it.
Are the spray arms removable? On some models they are; on others they are not meant to come off.
Which cleaning products are approved? Some manufacturers recommend their own dishwasher cleaner, and using something else may not be advised.
Is vinegar permitted? Some brands allow it occasionally, and others do not mention it at all.
Does the machine have a maintenance or cleaning cycle? Some models include one, and the manual explains how to use it.
If you no longer have the paper manual, you can usually find a digital copy on the manufacturer's website by searching your model number. It's often printed on a label inside the door frame or along the edge of the door.
This guide sticks to the parts of the dishwasher that are meant to be user-accessible. It does not cover opening panels, reaching wiring or pumps, or taking apart hidden components. Those are jobs for the manual's instructions or a qualified service technician.
What Parts of a Dishwasher Usually Need Cleaning?
Most dishwashers have a handful of areas where residue tends to build up. Which of these you can actually reach depends on your model.
The filter or filter area: Food debris is designed to end up here, so it's one of the most important spots to check.
The bottom of the tub: Small bits of food, paper labels and other debris can settle around the base.
Door edges: The sides and bottom of the door don't get the same direct spray as the center of the tub, so residue can linger.
The gasket or seal: The rubber seal around the door can collect grime and moisture.
Spray arms: Openings can become partly blocked by debris on some models.
Racks: Residue and loose debris can gather on racks and around the rollers.
Interior surfaces: Walls and the tub can develop a film from detergent or minerals.
The exterior door and controls: Fingerprints and splashes show up here, and the finish may need specific care.
Treat this as a menu of places to look, not a list of things every machine requires you to dismantle.
How to Clean a Dishwasher Step by Step
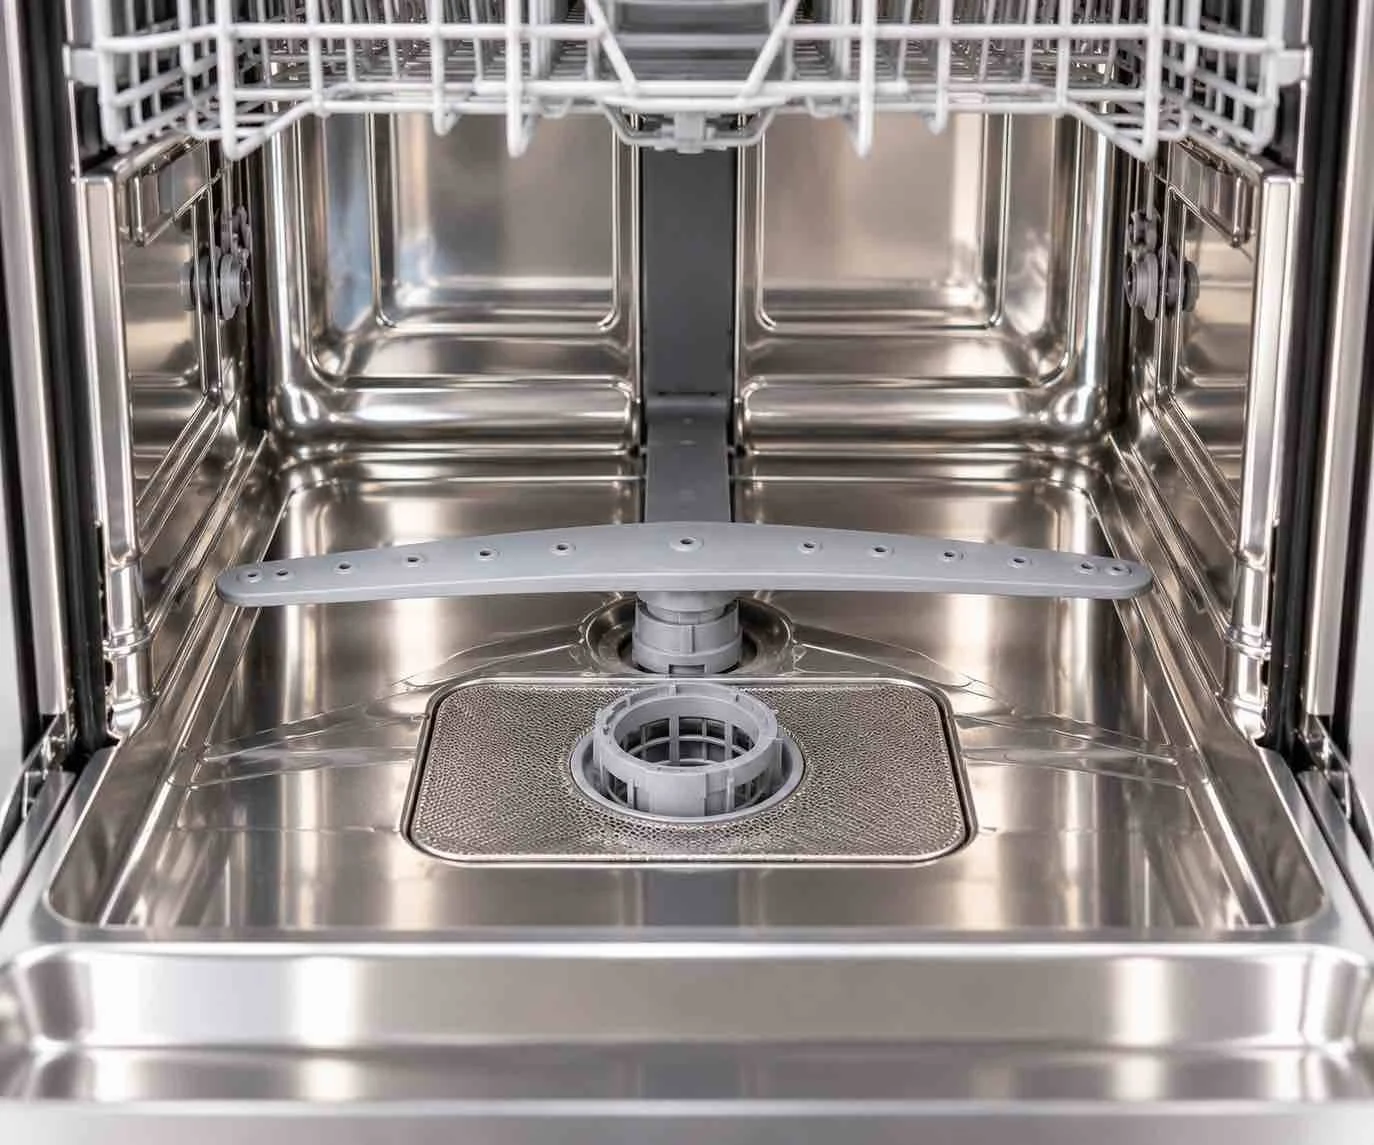
The steps below move from the simplest tasks to the more detailed ones. You can do all of them in one session or spread them out.
1. Empty the Dishwasher
Start by removing all the dishes, utensils and any loose items from the racks. An empty machine gives you a clear view of the tub, the filter area and the spray arms, and it keeps you from bumping into dishes while you work. It's also a good moment to pull out the bottom rack if your manual says it's easy to do, since that makes the base easier to see.
2. Remove Loose Food and Debris
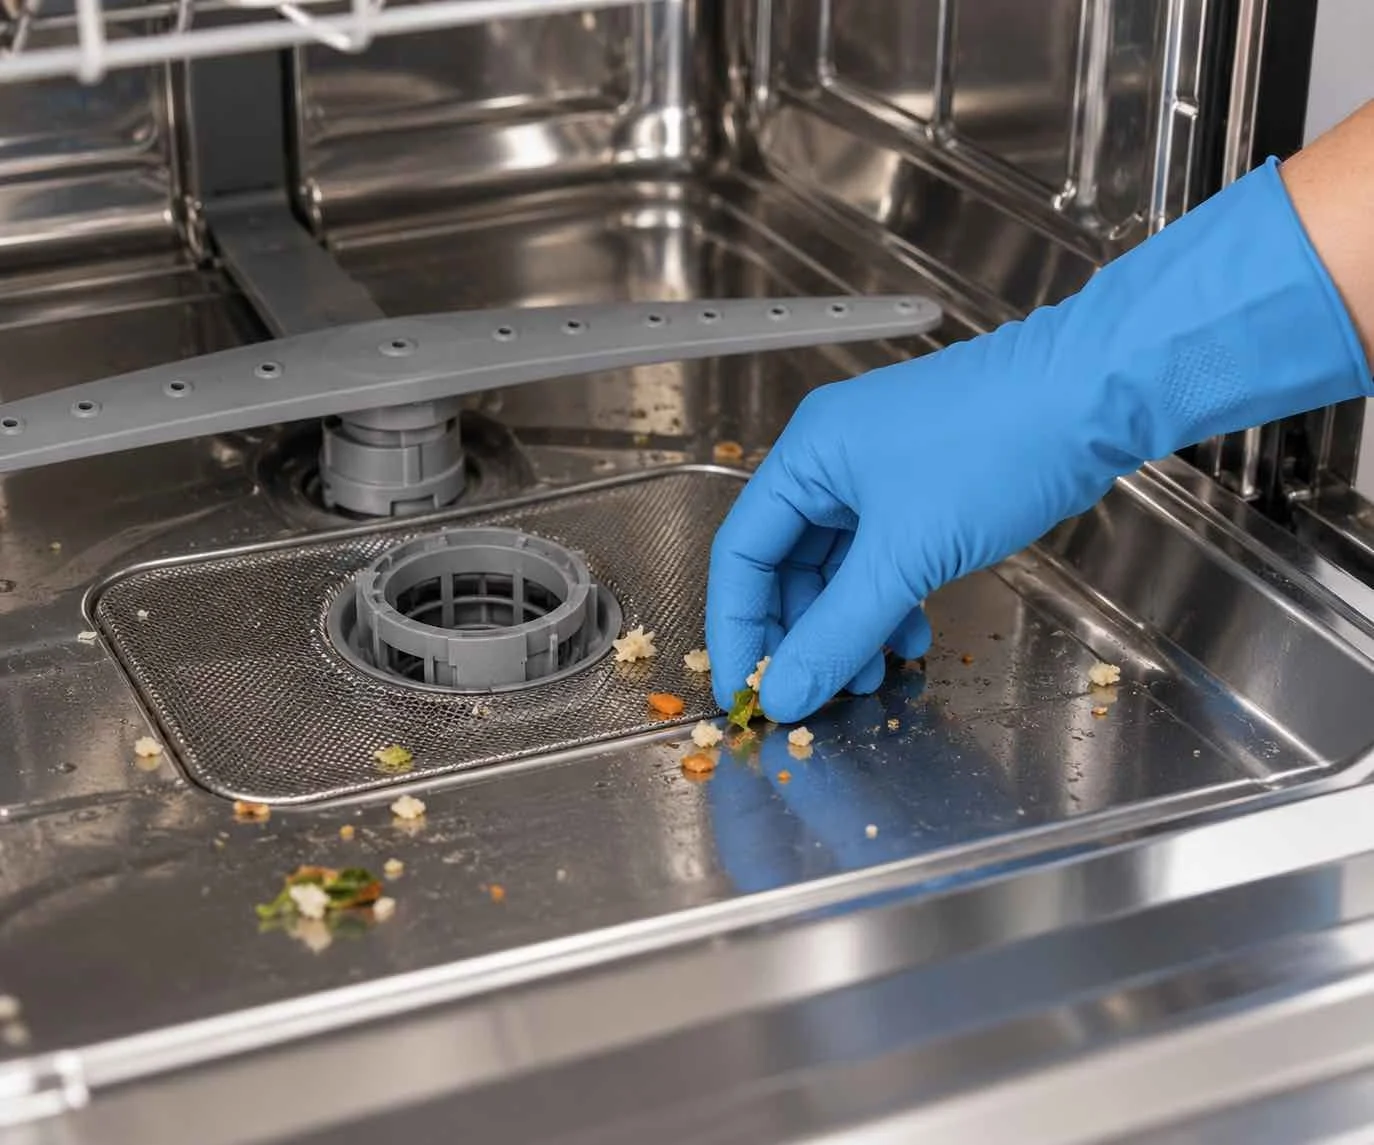
Look at the bottom of the tub for visible debris: food particles, bits of paper from labels, small pieces of packaging, a stray toothpick or seeds. Pick up what you can see and reach comfortably, and discard it.
Be careful if you notice small fragments of broken glass or anything sharp. Wear gloves, and don't run your hand blindly into areas you can't see. If something is lodged where you can't safely reach it, leave it and check your manual or contact the manufacturer rather than digging around.
Clearing loose debris first matters because it prevents those particles from being pushed toward the filter or sprayed around during the next cycle.
3. Check the Dishwasher Filter
If you're wondering how to clean a dishwasher filter, the first step is finding out what kind your machine has. This is where models differ the most.
Some dishwashers have a removable, manual-clean filter that collects food debris and is meant to be rinsed periodically. Others use self-cleaning or non-removable filtration, where there's nothing for you to pull out. The only way to know is to check the manual for your specific model.
If your manual says the filter is removable, here is the general approach:
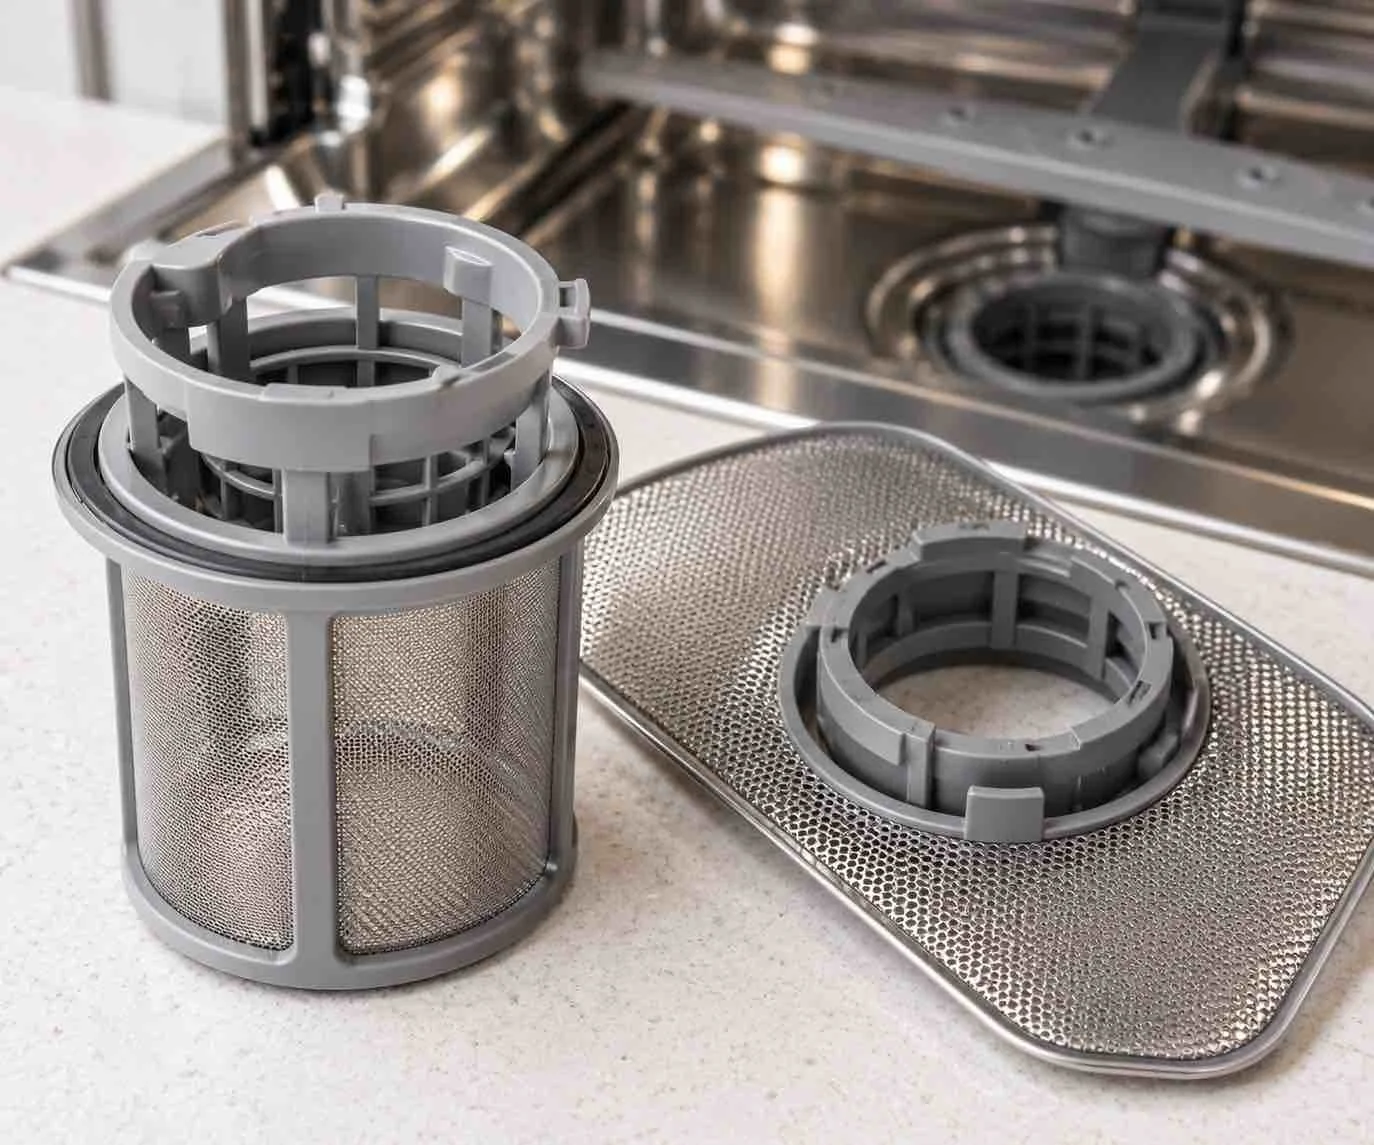
Follow the manufacturer's directions for removing it. Don't guess at a twist direction or lift mechanism, because they vary.
Rinse away loose debris under running water.
If the manual allows it, use a little mild dish soap and a soft brush to clean the filter. Avoid anything abrasive unless the manufacturer says it's fine.
Reinstall it securely, following the manual's directions, so it sits properly before you run the machine.
Never force a filter that doesn't want to move. If it feels stuck, stop and recheck the instructions.
How often a filter needs attention also depends on the machine, how often you run it and how much food goes into it. There isn't a single schedule that suits every dishwasher, so the manual is a better guide than a general rule.
4. Wipe the Bottom and Interior
Once the larger debris and the filter are dealt with, wipe down the accessible interior. Residue tends to collect along the tub, around the filter area, in corners and near the lower edge of the door.
A soft damp cloth or sponge is usually a good starting point. Add a little mild soap if your manufacturer allows it. Skip abrasive scrubbers and harsh pads unless your manual specifically approves them, since they can scratch interior surfaces. Wiping away a film now makes it easier to see whether any stubborn buildup remains.
5. Clean the Door Edges and Gasket
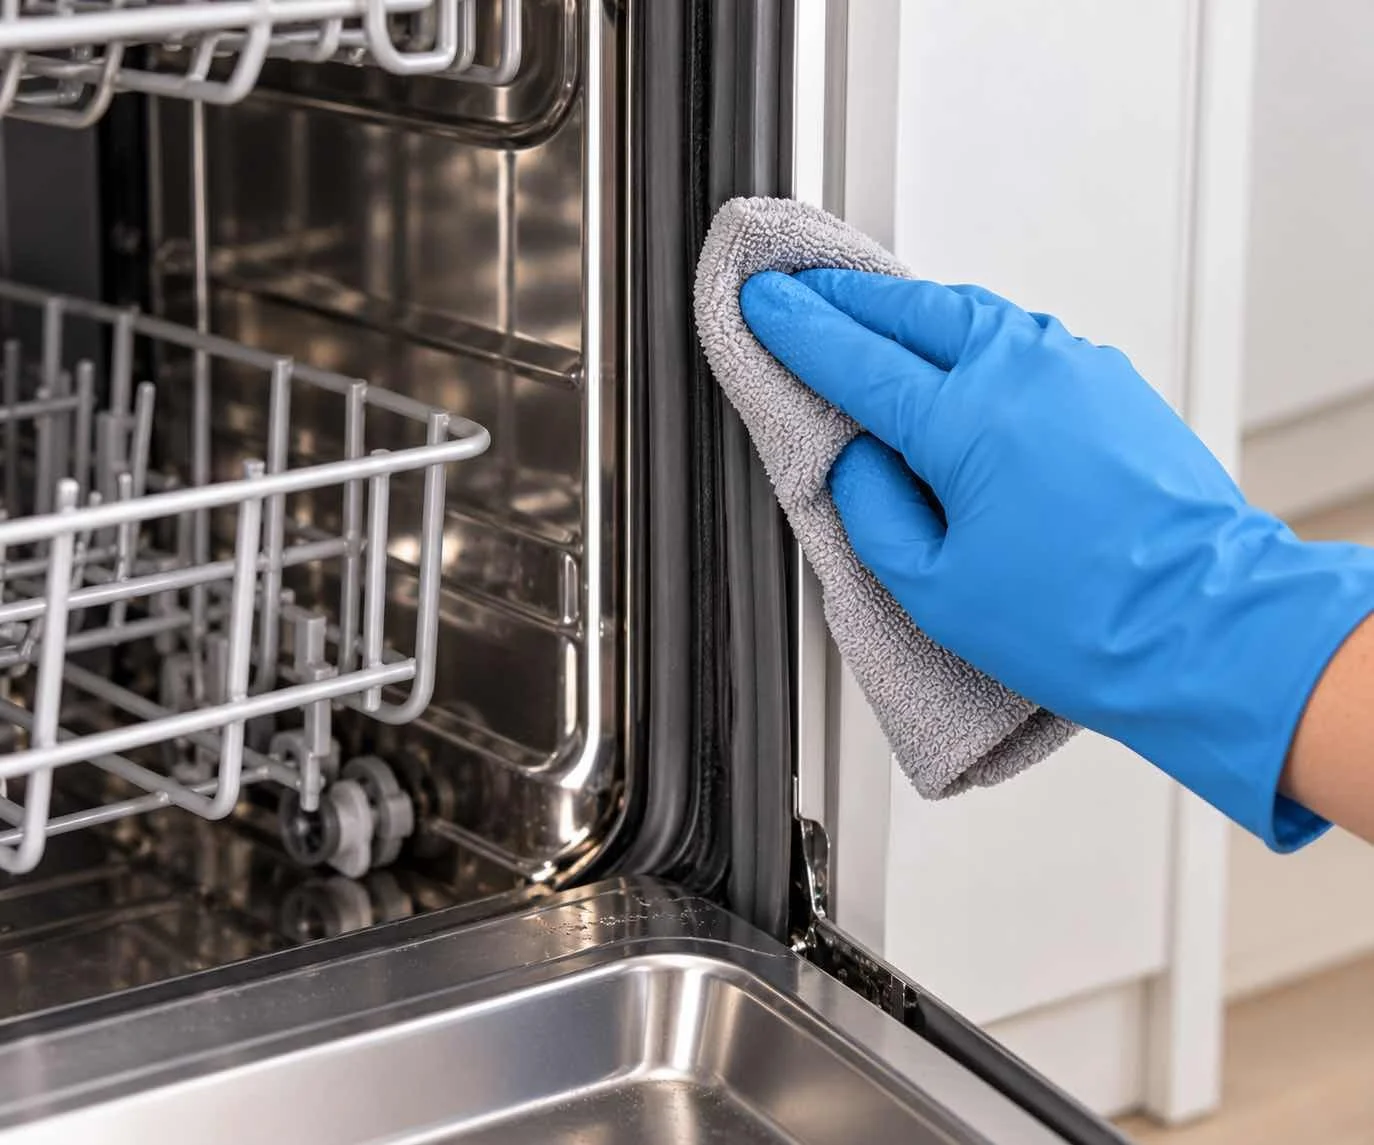
The door edges and the rubber gasket are easy to overlook. They don't receive the same direct water spray as the center of the tub, so residue and grime can build up there.
Wipe these areas with a soft damp cloth. A little mild soap may be fine if your manufacturer permits it. Be gentle: don't pull, remove or stretch the seal. A damaged gasket can affect how the door closes, and replacing one is a job for the manual's instructions or a technician.
Avoid chlorine-based cleaners on seals unless the manufacturer's guidance explicitly calls for them. When you're not sure, plain damp-cloth cleaning is the safer choice.
6. Inspect the Spray Arms
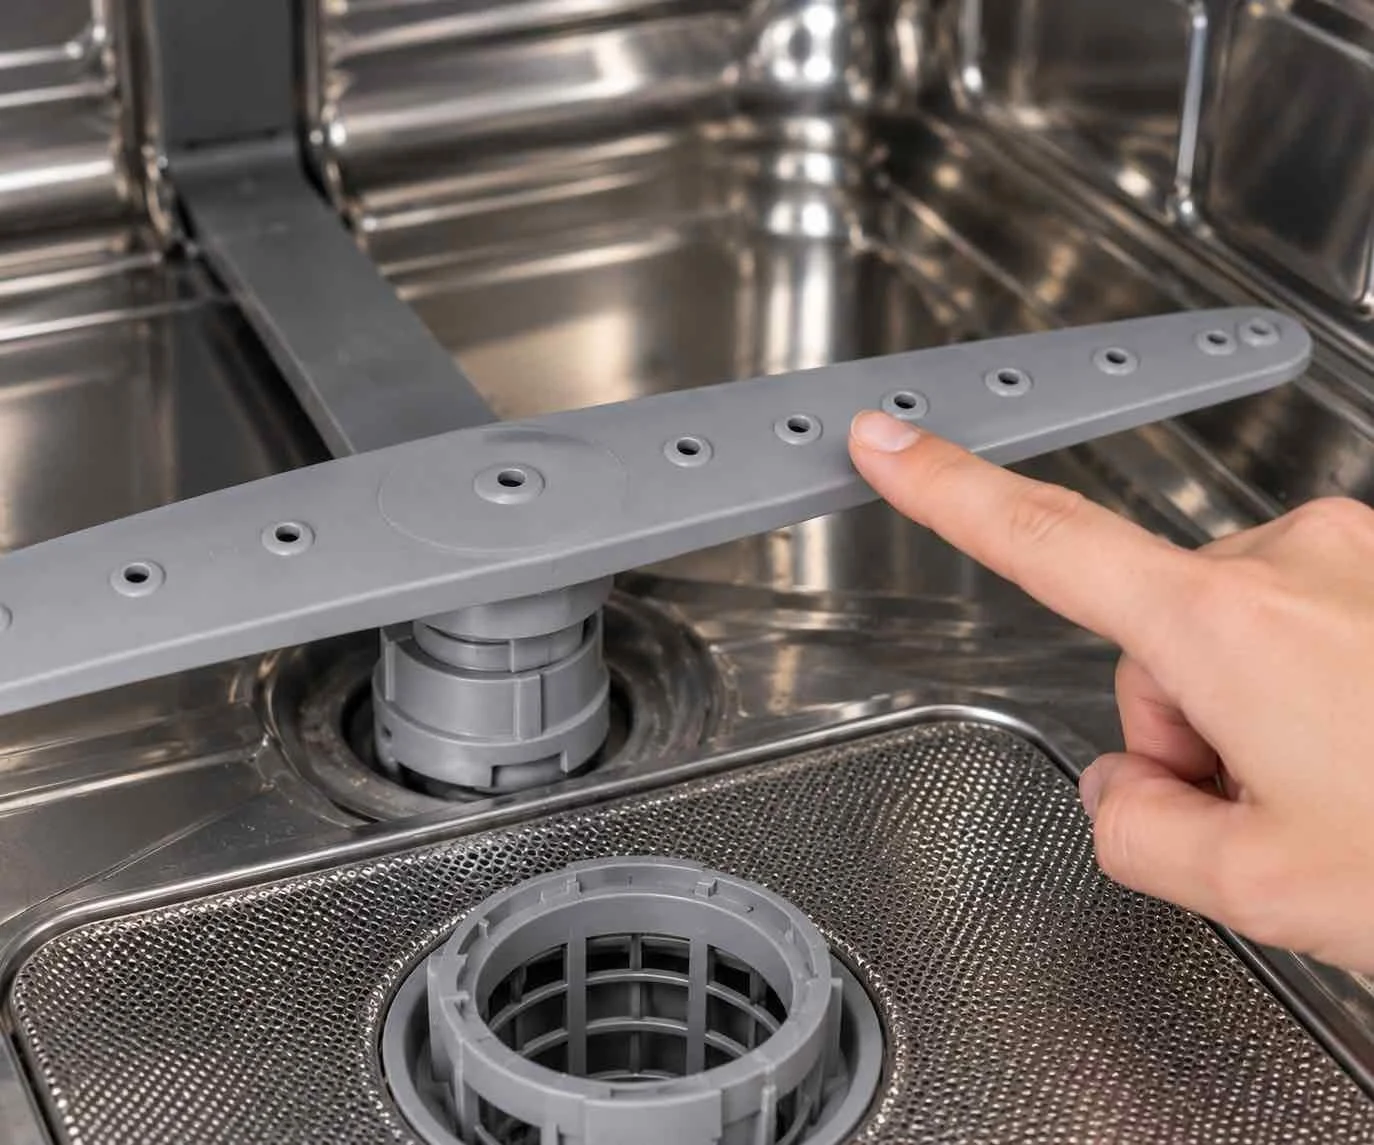
The spray arms push water through small openings to reach your dishes. If those openings get partly blocked, water flow can be affected, and dishes may not come out as clean.
Start by looking at the spray arms where they sit. Check for visible bits of food, paper or mineral buildup around the holes. If your owner's manual says the arms are removable, follow its directions for taking them off and putting them back. If they're not meant to be removed, or you can reach the openings without removing anything, gently clear any visible debris using the method your manufacturer recommends.
Please don't push sharp metal objects into spray holes, because you can damage the arm or push debris further in. And don't assume every spray arm comes off. Plenty don't, and forcing one can cause problems.
7. Clean the Racks
Wipe down the racks to remove visible residue. Check the rollers and the areas where the racks slide for loose debris that might have collected. Keeping these areas clear helps the racks move smoothly and keeps stray particles from falling toward the tub.
This is a light cleaning step only. If a rack coating is chipped or a roller is broken, that's a repair question for the manufacturer rather than something to fix through cleaning.
8. Clean the Exterior
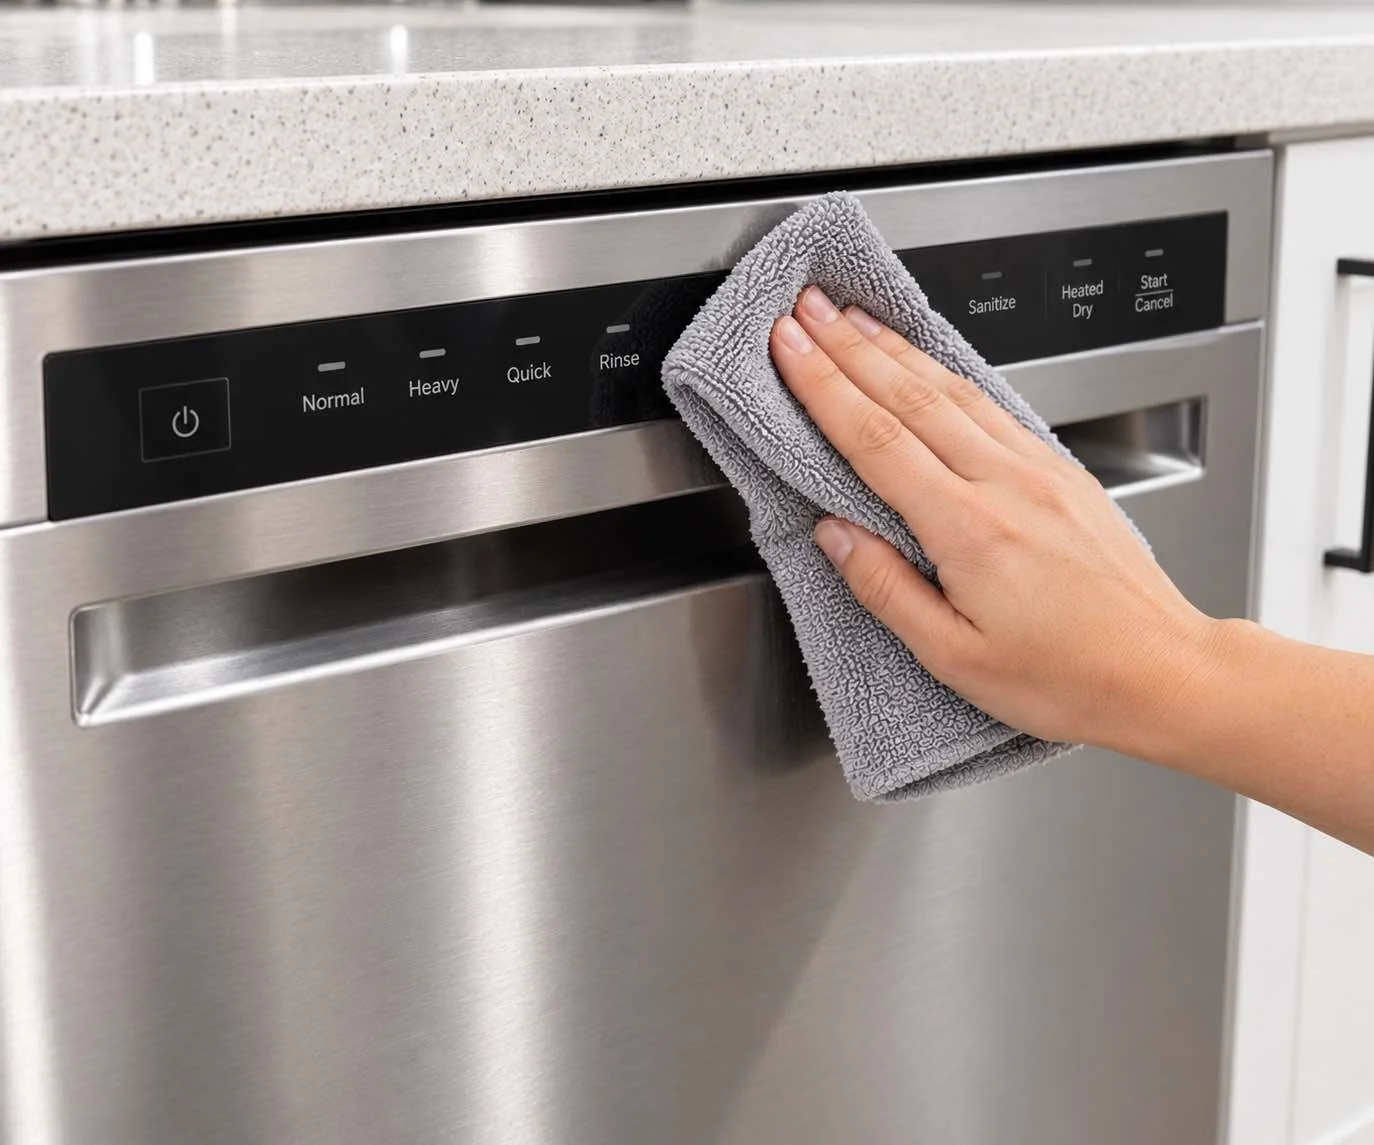
For many finishes, a soft damp cloth is a safe place to start, but exterior care instructions vary. Stainless-steel finishes and coated fingerprint-resistant surfaces, for instance, can call for different treatment. Some cleaners or abrasive pads can dull or damage these finishes.
Check the manufacturer's care instructions for your model's finish, and avoid abrasive products unless they're explicitly approved. Don't forget the controls and the area around the handle, which tend to collect fingerprints and splashes.
How to Deep Clean a Dishwasher
When people ask how to deep clean a dishwasher, they often imagine stronger chemicals or more aggressive scrubbing. In practice, a deeper clean is really a more complete maintenance check. It usually means:
clearing accessible debris from the tub
checking the filter, if your model has one that's meant to be cleaned
wiping interior surfaces, door edges and the gasket
inspecting the spray arms for blockages
using a manufacturer-approved cleaning method or maintenance cycle if one is recommended
A deep clean isn't about escalating to harsher products. It's about covering all the areas the manufacturer expects you to look after. If your manual describes a particular cleaning cycle or recommends a specific dishwasher cleaner, that's the route to follow.
Can You Clean a Dishwasher With Vinegar?
Many people search for how to clean a dishwasher with vinegar, and the honest answer is that it depends on the manufacturer.
Some brands allow occasional white-vinegar cleaning. Whirlpool, for example, provides instructions for placing white vinegar in a dishwasher-safe container and running a cycle. At the same time, Whirlpool warns that vinegar is acidic and that frequent use could damage the dishwasher. Other manufacturers may not mention vinegar at all, or may recommend a specific dishwasher cleaner instead.
Because of that mixed picture, it's best to approach vinegar carefully:
Check your owner's manual first. If vinegar isn't mentioned or is discouraged, skip it.
Don't assume it's approved for every machine. What one manufacturer allows, another may not.
Don't pour vinegar directly onto rubber seals or other components unless the manufacturer instructs you to.
Don't turn it into a regular habit if your manufacturer doesn't recommend that.
If you do follow a brand's vinegar procedure, use the amounts and method in that brand's instructions rather than a general recipe. Any specific quantities you see for one brand, including Whirlpool's, are an example for that manufacturer's machines, not general advice for all dishwashers.
What About Baking Soda?
Some household-cleaning guides and a few manufacturers mention baking soda in connection with dishwashers, but approval varies from brand to brand. There isn't a universal procedure that applies to every machine.
If your manufacturer recommends a specific baking-soda method, follow those directions exactly. If it doesn't, stick with the cleaning method described in your dishwasher's manual. And please don't combine baking soda and vinegar in the dishwasher. The fizzing can look impressive, but it doesn't mean the cleaning is better, and it isn't a manufacturer-approved approach.
Never Mix Household Cleaning Chemicals
This is a short section, but it's an important one. Don't mix household cleaning products unless the product labels and the manufacturer's instructions specifically say that the combination is safe.
In particular, never mix chlorine bleach with vinegar or other acids, with ammonia, or with other cleaners that may be incompatible. Mixing certain products can release hazardous fumes. If you're unsure whether something is safe to use together, don't use them together. Use one approved product at a time, as directed, and don't experiment with combinations.
How to Clean Dishwasher Spray Arms
Since spray arms deserve a little extra attention, here's a quick recap of how to clean dishwasher spray arms safely:
Inspect the visible openings. Look for food, paper or mineral debris around the holes.
Check the manual before removing an arm. Not every model is designed for spray-arm removal, and the procedure varies when it is.
Rinse accessible, removable arms where permitted. Running water often clears loose particles.
Reinstall correctly. An arm that isn't seated properly may not spin as it should.
Bosch, for example, recommends checking spray arms for blocked openings and following model-specific procedures for cleaning them. Other brands have their own guidance, so use the instructions for your appliance. If a spray arm looks damaged or doesn't turn freely even after cleaning, that goes beyond routine maintenance.
How Often Should You Clean a Dishwasher?
There isn't one frequency that fits every dishwasher. Recommended schedules depend on:
the manufacturer
the design of the dishwasher
your water hardness
how often you run the appliance
how much food and debris goes into the machine
Manufacturers give different guidance. Whirlpool, for instance, recommends roughly monthly interior maintenance for some models and products. Bosch commonly recommends cleaning certain filters every few months. GE notes that some removable filters need periodic cleaning, while other machines use self-cleaning filtration. These are manufacturer-specific examples, not universal rules.
A more practical approach is to check the manual for your model and pay attention to what the dishwasher is telling you:
visible buildup
food debris around the filter or tub
odors
gritty residue on dishes
reduced cleaning performance
Keep in mind that an odor doesn't automatically mean the dishwasher is dirty. Smells can have several causes, and it's worth looking at the whole picture.
Signs Your Dishwasher May Need Cleaning
Here are some common signs that it may be time for a cleaning session:
Visible food debris in the tub or around the filter area
Residue around the filter area or the bottom of the tub
A mineral film on the interior, which may look cloudy or chalky
An odor that lingers after a cycle
Gritty dishes after washing
Blocked spray openings you can see during an inspection
Visible buildup on interior surfaces, racks or the door edges
These signs can point to buildup, but they can also have other causes, such as loading habits, detergent choice or a mechanical issue. Cleaning may help in some cases, but it isn't guaranteed to solve every problem.
When Cleaning May Not Solve the Problem
Sometimes the issue isn't about cleaning at all. You may need to consult the manufacturer's troubleshooting guide or a professional service if you notice:
the dishwasher not draining
standing water that doesn't clear normally
leaks
error codes
unusual electrical smells
repeated poor cleaning even after routine maintenance
damaged seals or other damaged components
This guide doesn't cover electrical or pump repairs, and you shouldn't try to disassemble the machine to find the cause. If you notice a burning or electrical smell, smoke or any suspected electrical fault, stop using the appliance and follow the manufacturer's guidance or contact a qualified service provider.
Common Dishwasher Cleaning Mistakes
A few habits can turn a simple cleaning job into a problem. Here are the most common ones and why they matter:
Assuming every filter is removable. Some dishwashers use non-removable or self-cleaning filtration, and trying to pull one out can damage it.
Forcing a filter or spray arm. Parts that are stuck often have a specific release method, and forcing them can break them.
Using abrasive scrubbers. These can scratch interior surfaces and finishes.
Using vinegar too frequently. Because vinegar is acidic, frequent use may damage components, according to some manufacturers.
Mixing cleaners. Combining products can create hazardous reactions and fumes.
Pouring cleaning products directly onto seals. Without instructions, this can harm the rubber.
Forgetting the door edge and gasket. Residue builds up there because it doesn't get the same spray as the rest of the tub.
Ignoring the owner's manual. It's the only source that applies specifically to your model.
Treating a mechanical fault as a cleaning problem. Draining issues or leaks need troubleshooting, not extra scrubbing.
Using instructions meant for another brand or model. What works for one machine may not be appropriate for another.
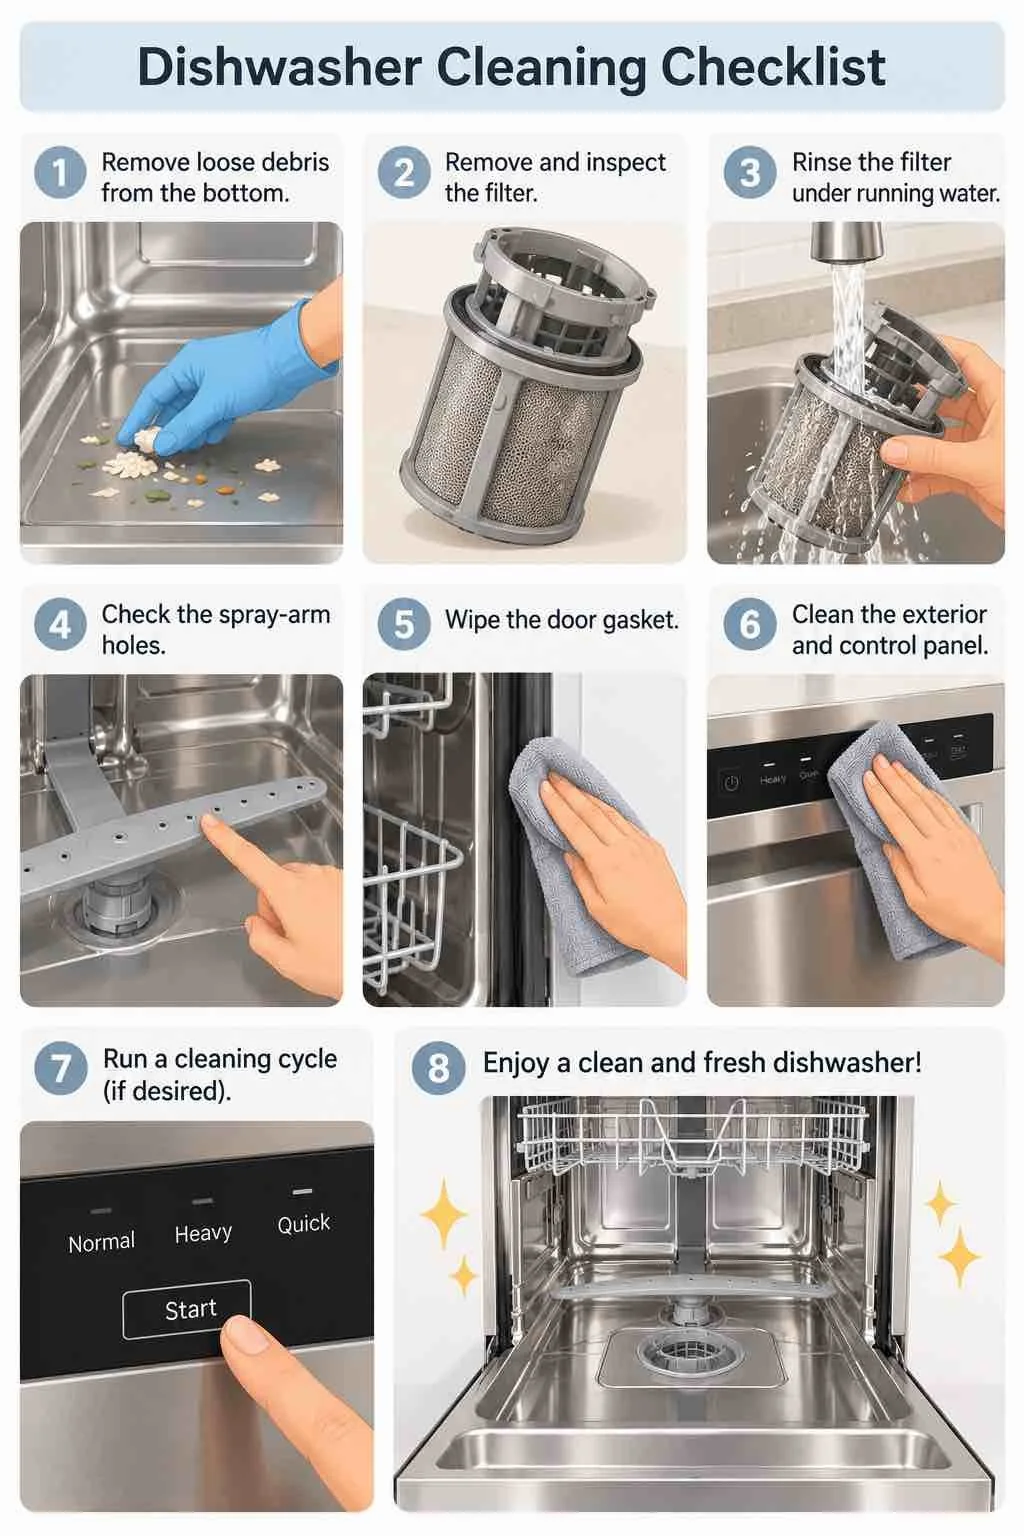
A Simple Dishwasher Cleaning Checklist
Here's a quick version to keep handy:
Empty the dishwasher
Remove loose debris
Check the manual
Inspect the filter
Wipe the accessible interior
Wipe the door and gasket
Inspect the spray arms
Wipe the racks
Clean the exterior
Use a manufacturer-approved maintenance cycle or cleaning method if needed
Reinstall any removed parts correctly
How Dishwasher Cleaning Fits Into a Practical Kitchen Routine
Dishwasher maintenance is easier when it's part of a routine rather than a big occasional project. It helps when food debris doesn't get a chance to accumulate, when you check the filter according to what your model needs, and when dishes and kitchen items have an easy workflow so loading and unloading doesn't feel like a chore.
It also helps when the space around the dishwasher stays accessible. If the area is cluttered, even a quick wipe-down or a filter check feels like more work than it is. If you're rethinking your layout, these small kitchen ideas can help you make the most of limited space, and pantry and kitchen organization ideas can keep everyday items where you need them, so the dishwasher area doesn't become a catch-all.
Frequently Asked Questions
What is the best way to clean a dishwasher?
The best method is the one approved for your specific model. In general, that means removing debris first, inspecting the filter if your machine has one that needs cleaning, wiping the interior and door edges, and using a manufacturer-approved cleaning method if one is recommended.
Do all dishwashers have filters that need cleaning?
No. Some dishwashers have removable, manual-clean filters, while others use self-cleaning or non-removable filtration. Check the manual to see which kind you have.
Can I use vinegar to clean my dishwasher?
Some manufacturers allow occasional vinegar use, but it isn't universal. Vinegar is acidic, and some brands warn that frequent use may damage the appliance. Check your manual before trying it.
Can I put vinegar and baking soda in the dishwasher together?
It's not recommended. If your manufacturer has separate approved procedures for each, follow them separately and exactly as written. Don't improvise cleaning mixtures.
Why does my dishwasher smell?
Possible causes include food debris, residue or standing water, but odors can have several causes. Clean the accessible areas, and if the smell continues, consult the manual or the manufacturer.
Why are my dishes still gritty after cleaning the dishwasher?

Grit can come from filter debris, loading issues, blocked spray arms, detergent problems or other appliance issues. It's hard to pinpoint one cause with certainty, so work through the routine maintenance steps and consult the manufacturer if it keeps happening.
How do I clean the dishwasher filter?
First, confirm whether your model has a removable filter. If it does, follow the manufacturer's removal and cleaning instructions, rinse away debris and reinstall it securely.
A Clean Dishwasher Starts With the Parts You Can Safely Access
Keeping a dishwasher in good shape comes down to a few steady habits. Remove visible debris, check the filter according to your model, wipe the door edges and interior, and inspect the spray arms. Let the owner's manual guide what you remove and which products you use, and don't assume vinegar or any other cleaner is appropriate for every machine. Never mix household cleaning chemicals. And if the problem looks mechanical, like poor draining, leaks or error codes, bring in the manufacturer's troubleshooting or a service professional rather than cleaning harder.
