
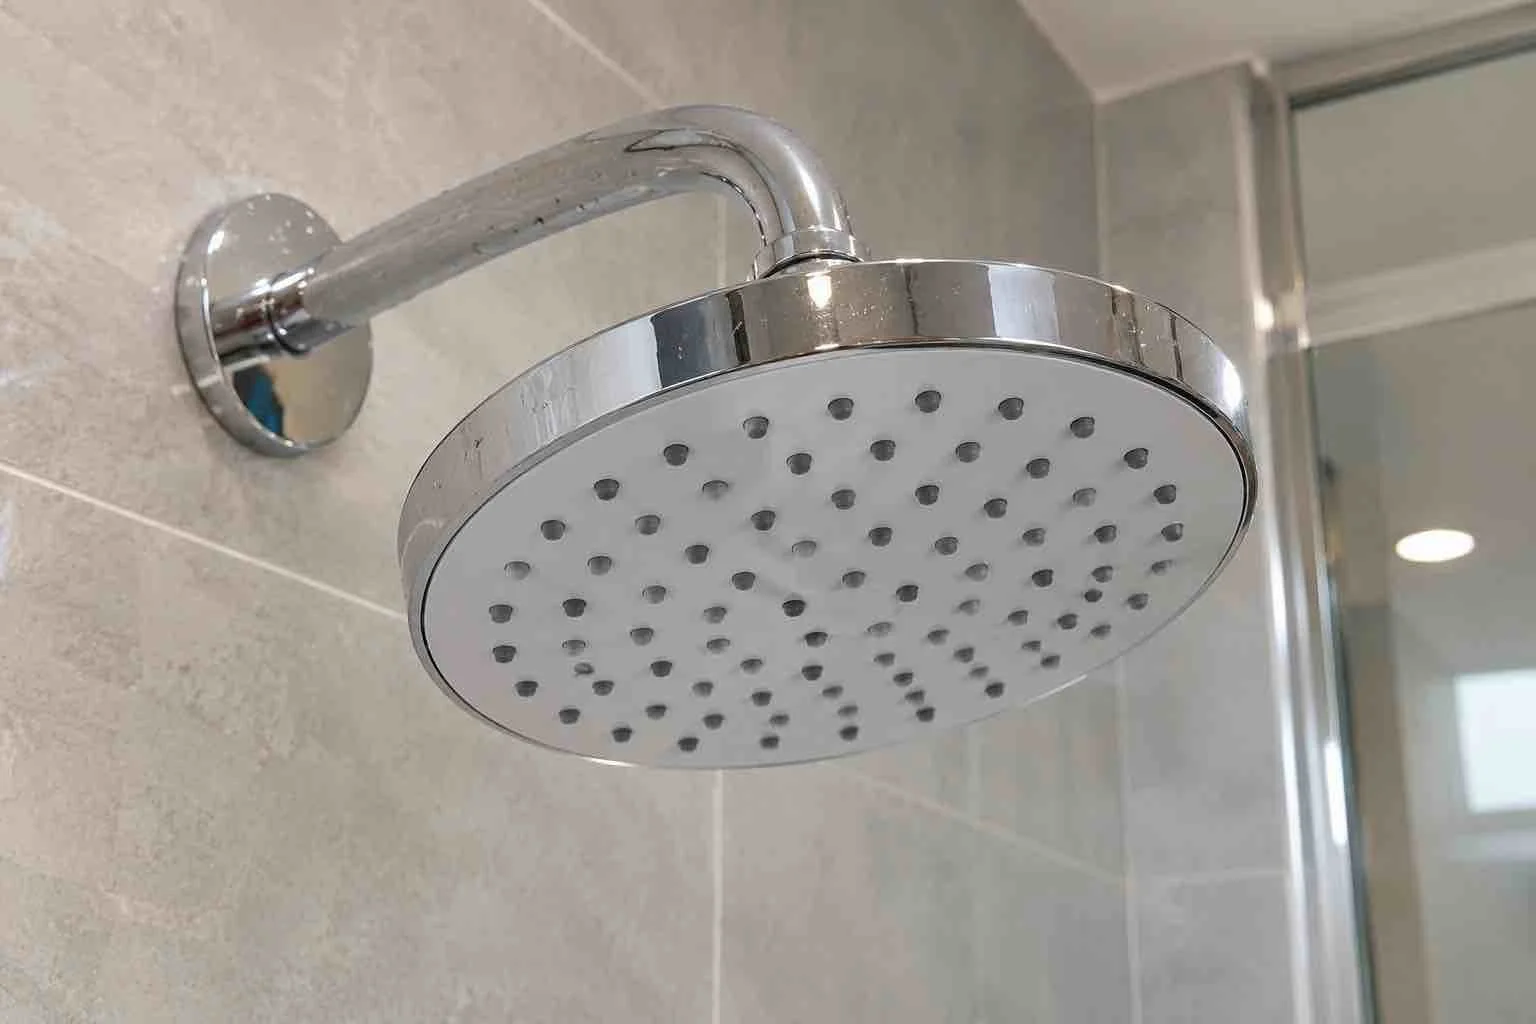
If you have ever noticed a weaker spray, water shooting off at odd angles, or white crust around the nozzles, you are probably looking at buildup. Every time water runs through a shower head, tiny amounts of minerals and soap residue can be left behind around the small openings. Over weeks and months, that residue can form visible deposits that change how the water sprays.
The good news is that learning how to clean a shower head is straightforward, and it usually takes only a few minutes of gentle work. The right method depends partly on what your shower head is made of and how it is finished. A plastic head with flexible rubber nozzles and a polished metal head with a delicate coating do not need the same treatment, so this guide starts with the gentlest options and explains when a stronger approach, such as vinegar, may or may not be appropriate.
Before You Start: Check the Shower Head Material and Finish
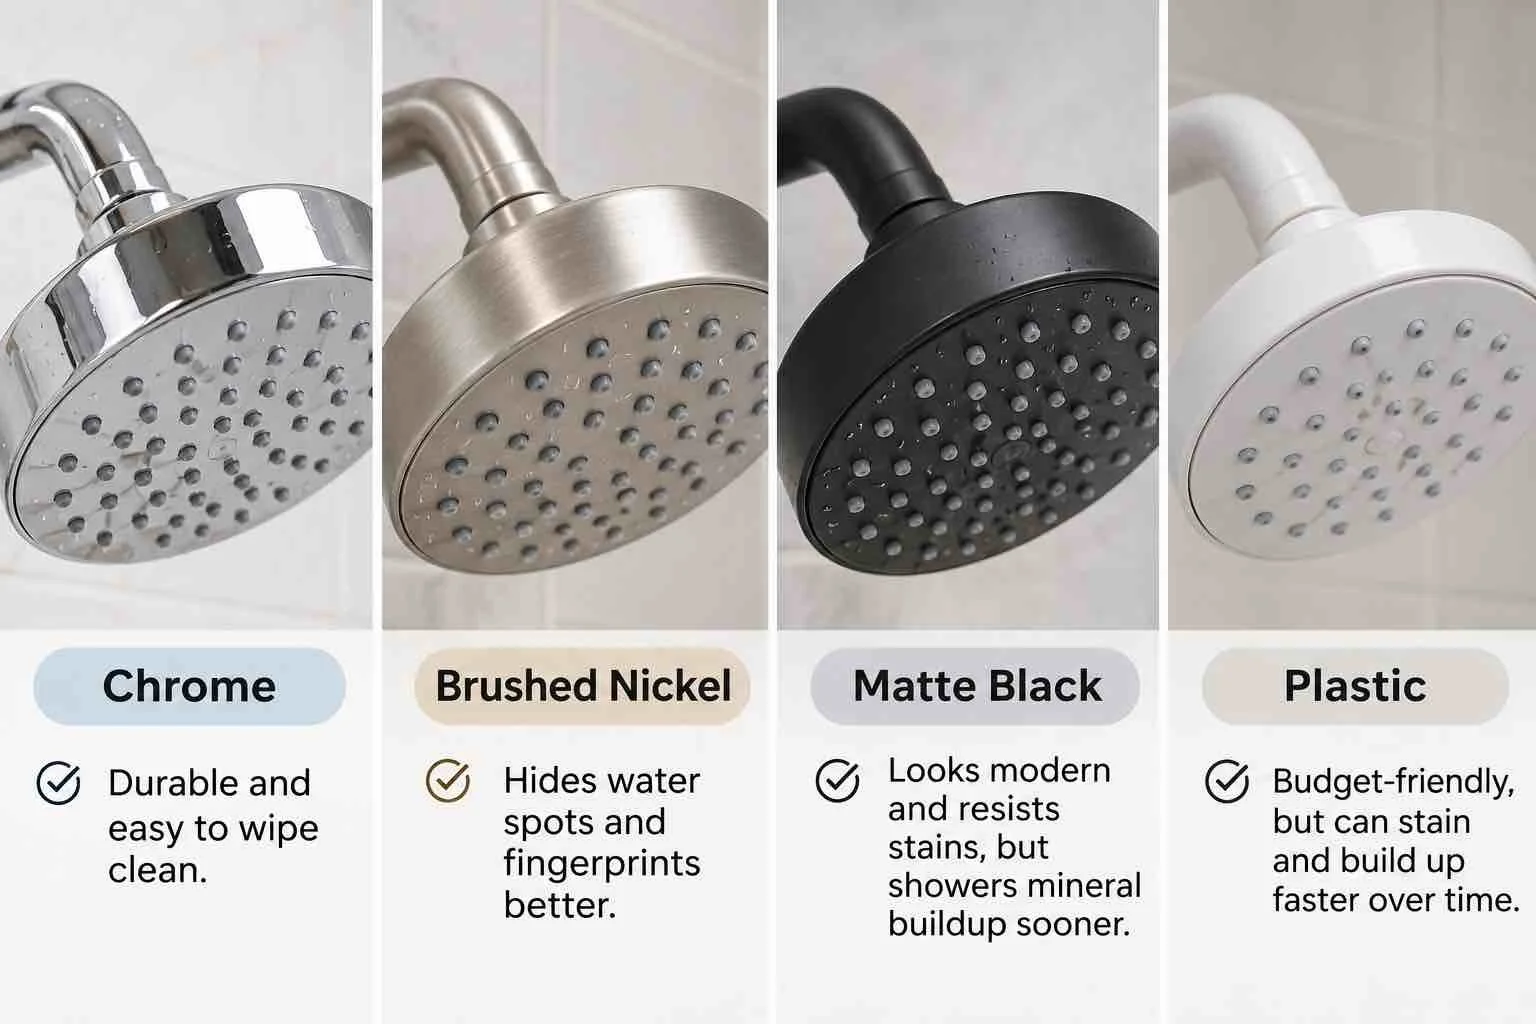
Before you pick a cleaner, find out what your shower head is made of. Shower heads come in chrome, brushed nickel, brass, matte black, plastic, and many coated, painted, or specialty finishes. These materials do not all react the same way to acidic or stronger cleaners.
Check the manufacturer's care instructions first. They are often printed in the manual, on the packaging, or on the manufacturer's website, and searching the brand and model name usually turns them up. If you cannot find any guidance, start with the mildest method in this guide: warm water, mild dish soap, and a soft cloth.
Finishes such as coated, plated, painted, matte, brass, or other specialty surfaces deserve extra caution. Some can dull, streak, or discolor if they are exposed to acidic cleaners or scrubbed too hard, and that kind of damage is often difficult to reverse. When in doubt, stay gentle.
What You'll Need
You do not need every item below. Most routine cleaning only calls for the first four.
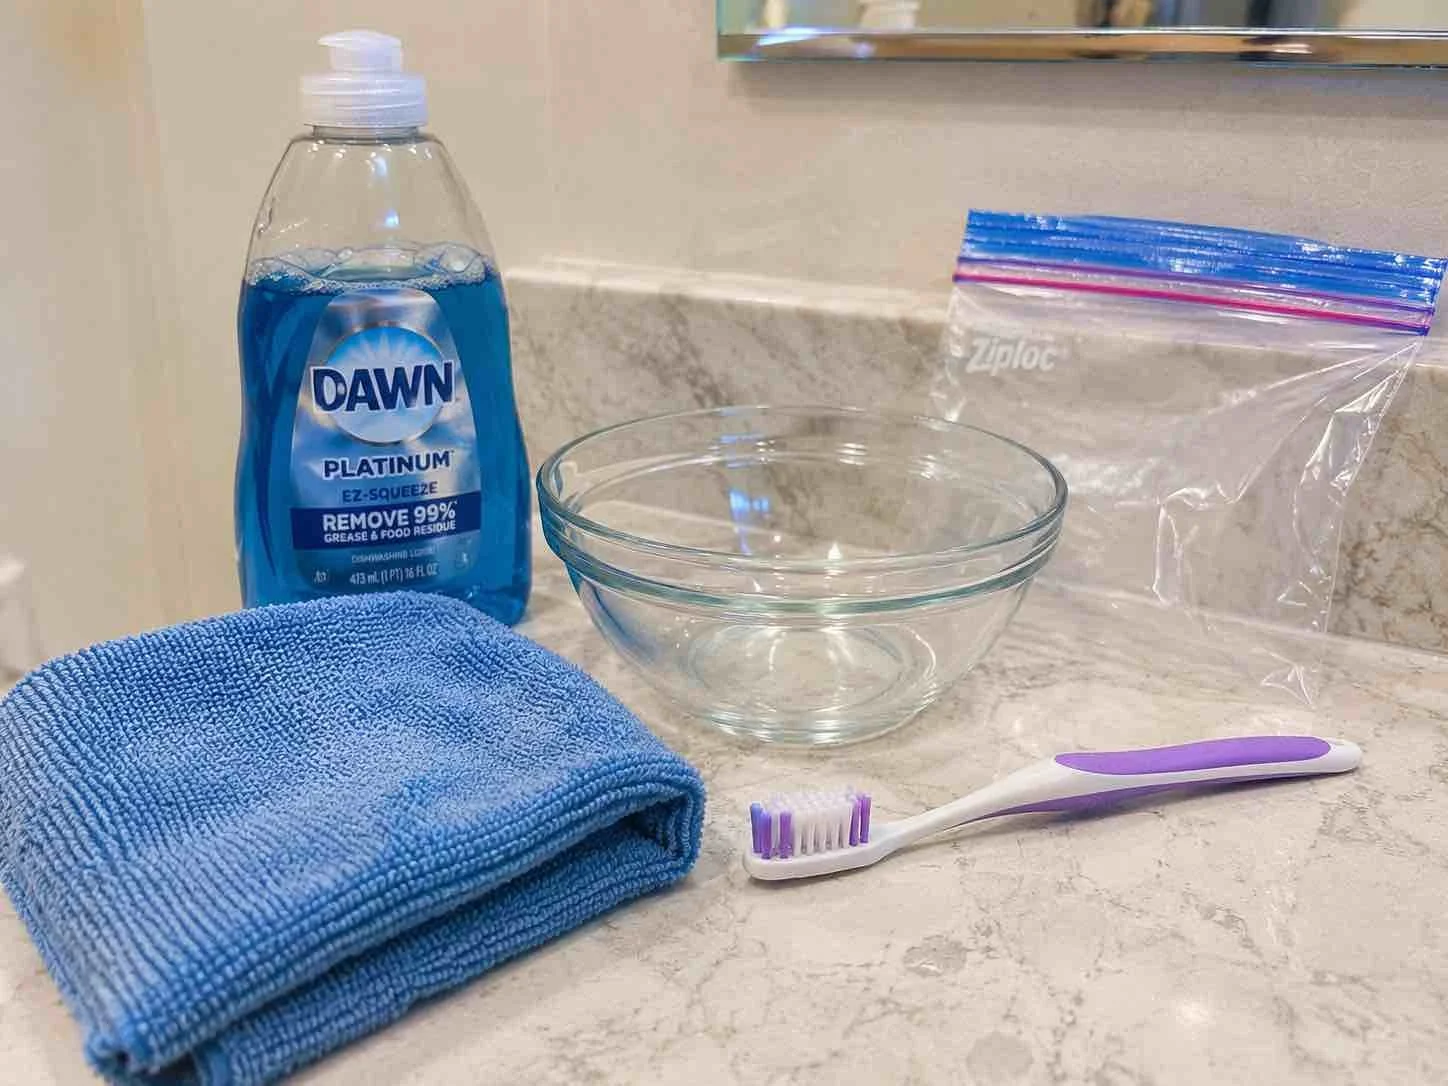
A soft microfiber cloth
A soft toothbrush or small soft-bristle brush
Mild dish soap
Warm water
A bowl or container (for a removable shower head)
A plastic bag and a rubber band or reusable tie (only for the attached-head soaking method)
White vinegar, only if your shower head's material and finish can handle it
Leave out the vinegar and the bag if the manufacturer advises against acidic cleaners or if you are unsure about the finish.
How to Clean a Shower Head Without Removing It
If your shower head is fixed in place, or you would simply rather not unscrew it, you can still clean it where it hangs. Start with the gentlest steps and only move on if buildup remains.
Wipe the exterior. Use a soft microfiber cloth dampened with warm water to remove soap film and surface residue from the faceplate and housing.
Gently rub flexible rubber nozzles, if present. Many shower heads have soft rubber or silicone nozzles. Rubbing each one lightly with your fingertip can help loosen deposits so they flake away.
Use mild soap and warm water for routine cleaning. Add a small amount of mild dish soap to a damp cloth or soft brush and work around the nozzle openings in small, gentle motions.
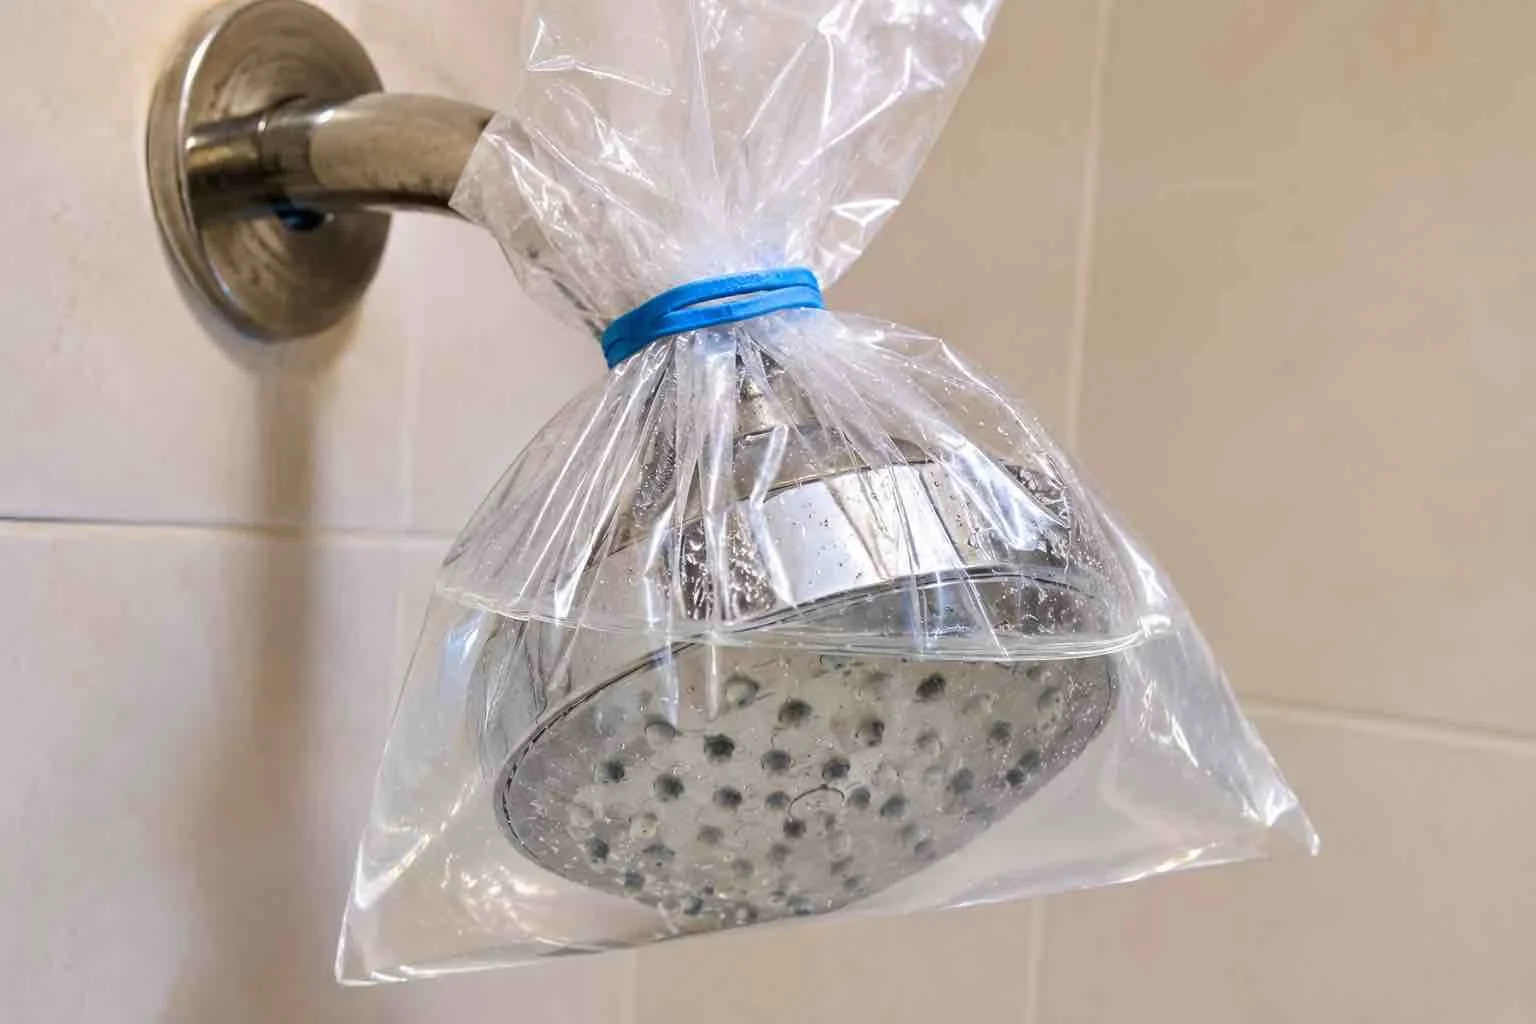
Optional: use a manufacturer-approved descaling method if buildup remains. If your shower-head manufacturer specifically allows vinegar, use the dilution and contact time it recommends. Some manufacturers, including Delta and Moen, recommend a 50/50 mixture of white vinegar and water for compatible products, while other manufacturers advise against vinegar entirely.
Rinse or run water afterward. Remove the bag, if you used one, then run the water for a short time to flush away loosened deposits and any cleaner residue.
Wipe the exterior dry. A dry microfiber cloth helps prevent new water spots from forming on the surface.
Vinegar is not a required step. For a lot of shower heads, soap, warm water, and a soft brush are enough.
How to Clean a Removable Shower Head
Some shower heads unscrew from the arm by hand, which makes cleaning easier because you can reach every surface. Only take yours off if it comes loose easily and the manufacturer's instructions say it is fine to do so. This guide does not cover plumbing work, so if the head is stuck or hard to turn, clean it in place instead.
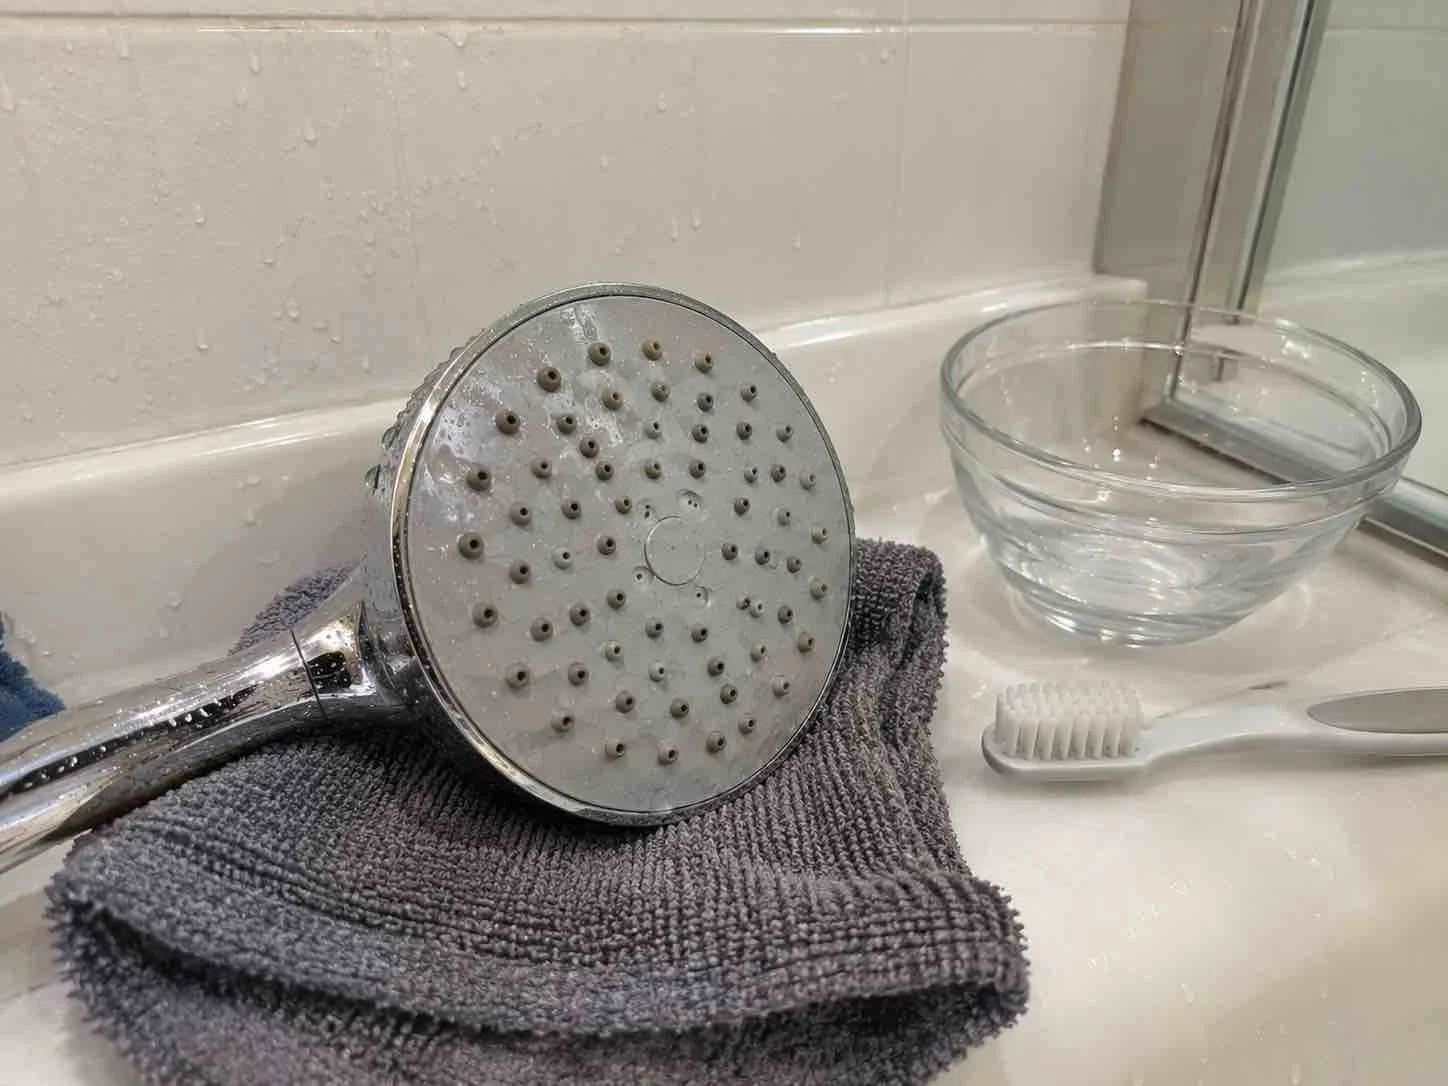
Protect the fittings. If you need a little extra grip, wrap a soft cloth around the connection point so the finish does not get scratched.
Unscrew gently. Turn the shower head counterclockwise by hand. Do not force it, and stop if it resists.
Clean removable parts gently. If the manufacturer allows, you can take out a removable filter screen or washer and rinse it under warm water. Wash the faceplate and body with warm water, mild dish soap, and a soft brush. Do not take apart components that are not meant to come apart.
Rinse thoroughly. Rinse every part under running water so no soap or loosened deposits remain in the openings.
Dry and inspect. Wipe the parts with a soft cloth and make sure small pieces such as washers are back where they belong.
Reinstall according to the manufacturer's instructions. Thread the shower head back on by hand and snug it gently. Overtightening can damage the threads or the finish, so follow whatever the instructions recommend.
How to Clean a Shower Head With Vinegar
White vinegar is mildly acidic, which is why it is a popular choice for mineral buildup. Acidic cleaners can help loosen the whitish deposits that water leaves behind, so this method may be useful when soap and warm water have not been enough.
Important: vinegar can damage or discolor some finishes and materials, including certain coated, painted, matte, brass, or specialty surfaces. Check the manufacturer's care instructions before you use it, and do not assume it is safe just because it is a common household product. If the instructions do not mention vinegar or say to avoid acidic cleaners, use the no-vinegar method below.
If your shower head's material and finish allow it:
Check the manufacturer's instructions for the approved vinegar dilution and contact time before soaking.
If vinegar is approved, place only the area that needs descaling in the recommended solution.
Check the shower head periodically and stop immediately if you notice dulling, spotting or a change in the finish.
Remove the shower head from the vinegar and gently scrub around the openings with a soft toothbrush.
Rinse thoroughly with water, run the shower for a short time, and wipe the exterior dry.
There is no single contact time that is right for every shower head. Shorter soaks with regular check-ins are usually more sensible than assuming an overnight soak is safe. Use vinegar by itself, and never combine it with bleach or any other household cleaner.
How to Clean a Shower Head Without Vinegar
If your shower head has a delicate finish, or the manufacturer advises against acidic cleaners, you can still clean it well with a routine method. For many shower heads, gentle cleaning with water and a manufacturer-approved mild cleaner is a sensible starting point, but always follow the care instructions for the specific finish.
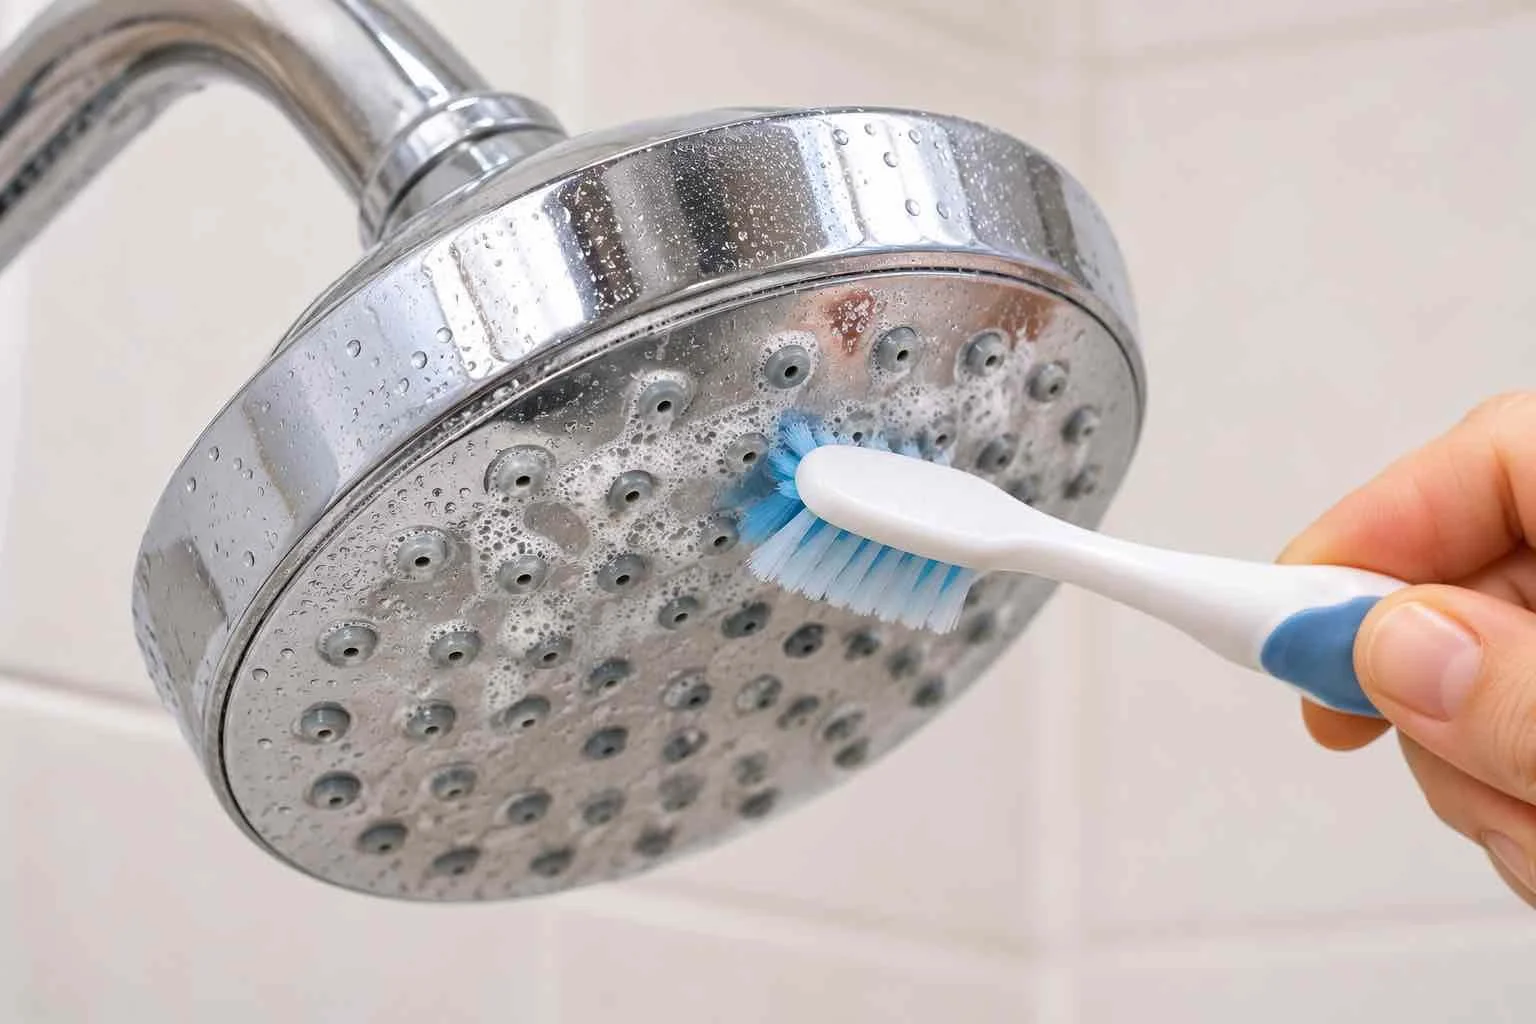
Dampen a soft cloth with warm water and wipe the faceplate and housing to remove loose residue.
Add a small amount of mild dish soap to the cloth or to a soft toothbrush.
Work around each opening in small, gentle circles, letting the bristles loosen residue without pressing hard.
Rub flexible nozzles lightly with a fingertip, if your shower head has them.
Rinse well by running warm water through the shower head until no suds or loosened material remains.
Wipe dry with a clean microfiber cloth.
Repeating this routine regularly can keep light buildup from becoming heavy, which often means you never need a stronger cleaner. If deposits remain after a couple of rounds, do not escalate right away. Check the manufacturer's care instructions to see which stronger cleaners, if any, they approve.
Cleaning Clogged Shower Head Holes and Rubber Nozzles
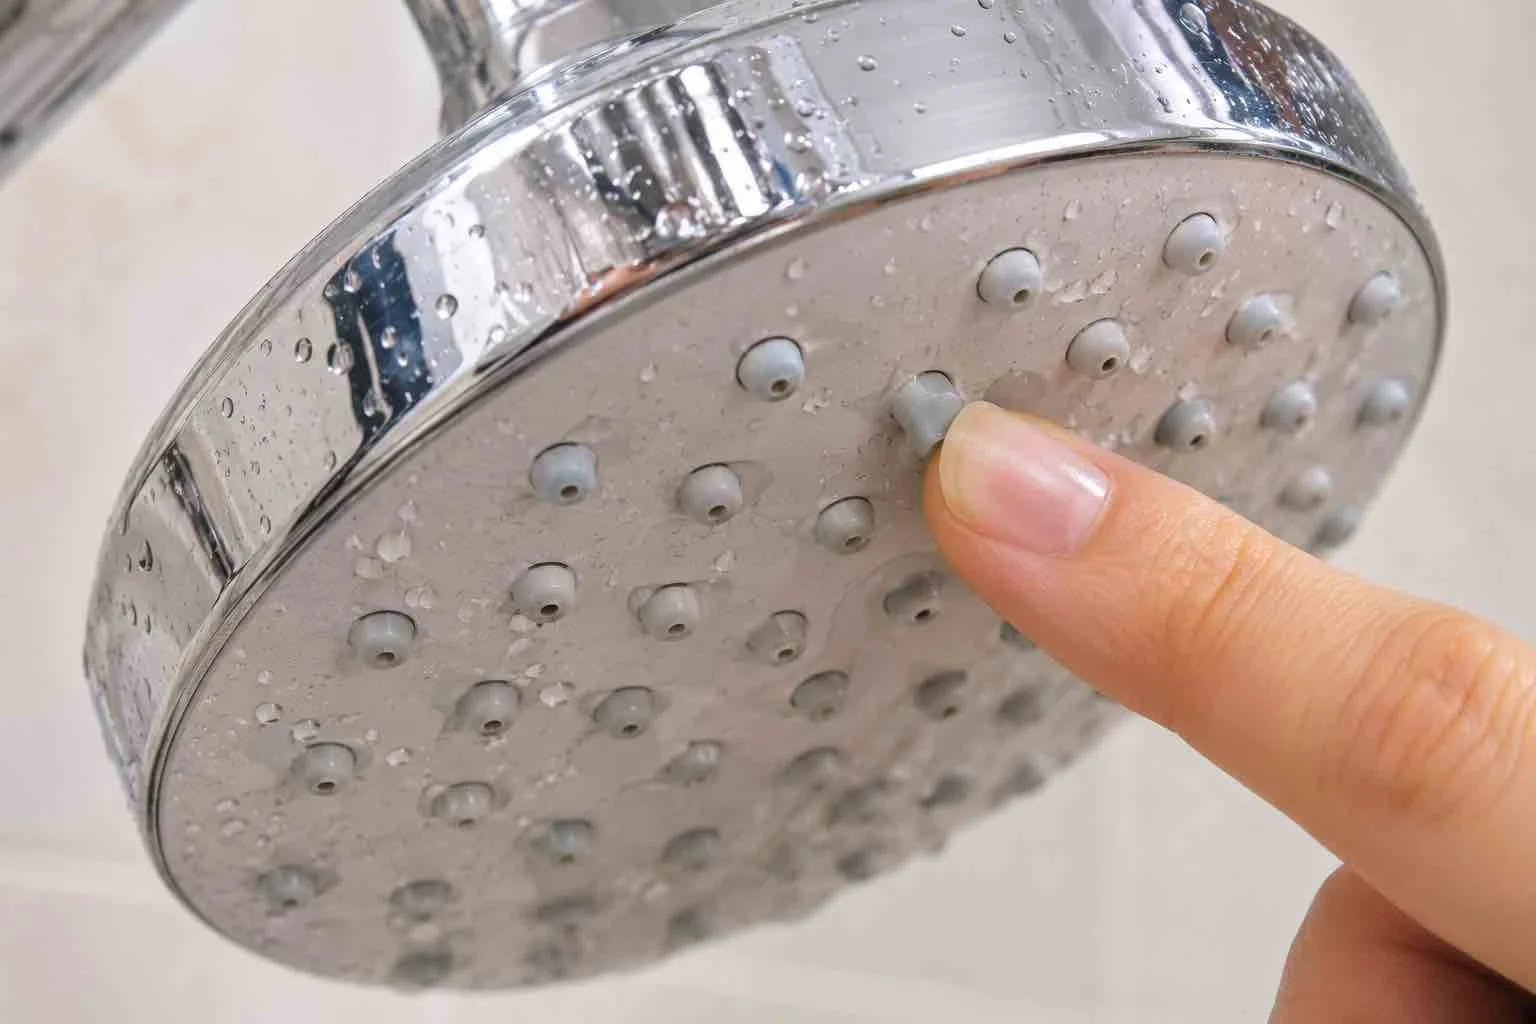
When spray becomes uneven, the nozzle openings are one useful place to check for visible mineral buildup. Clearing them takes patience more than force.
Flexible rubber nozzles: Many shower heads have soft nozzles that can be massaged. Rub each one gently with your fingertip, and deposits around the opening often crumble or flake off.
Rigid openings: A soft toothbrush can help around the holes if the manufacturer allows it. Use light pressure and short strokes, and work from the outside of the faceplate toward the center.
Rinse as you go: Run warm water through the shower head so loosened particles wash out rather than settling back into the openings.
Do not insert needles, pins, knives, or other metal objects into the nozzle openings. They can scratch or enlarge the holes and change how the water sprays. For the same reason, avoid wire brushes and scouring pads, which can mark delicate finishes.
What About Hard-Water or Limescale Buildup?
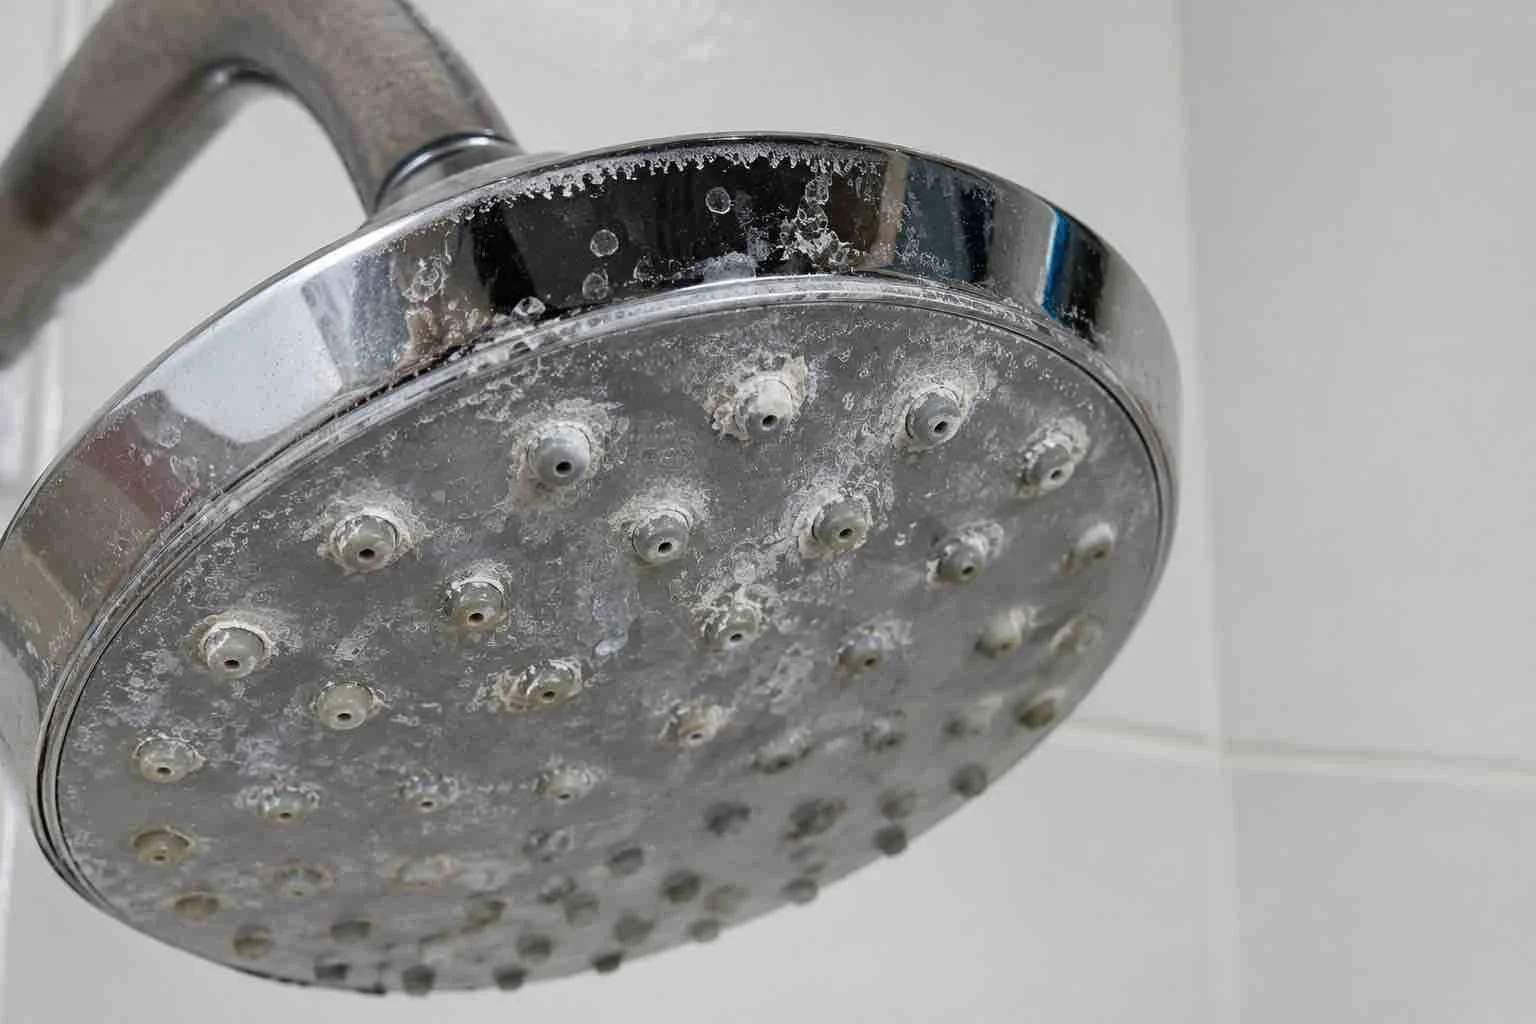
Mineral buildup, often called limescale, typically looks like white, chalky, or crusty patches around the nozzles and on the faceplate. It can also appear as cloudy spots or a rough film on the surface. These deposits are left behind as water dries, and homes in areas with hard water may notice them forming more quickly.
If you are dealing with hard-water deposits, you have a few practical options, from gentlest to strongest:
Wipe and gently brush after showers or during regular cleaning. Catching light buildup early often keeps it from hardening.
Use the mild soap-and-water routine described above, with a soft toothbrush around the openings.
Use white vinegar with short contact time, only if the manufacturer and finish allow it.
Consider a commercial descaling product only if the shower head's manufacturer approves its use. Follow the product label and the shower head manufacturer's instructions, and never mix it with other cleaners.
Whichever you choose, the method has to be compatible with the finish. Heavy or stubborn buildup is not a reason to switch to harsher products. If gentle cleaning does not work and the manufacturer offers no further guidance, it may be a sign to contact them.
Common Shower Head Cleaning Mistakes
Using an abrasive scrubber. Scouring pads and stiff brushes can scratch metal and coated finishes. A soft cloth and soft brush are enough for most jobs.
Soaking a specialty finish without checking care instructions. Coated, painted, matte, and brass finishes may react badly to acidic cleaners.
Mixing household cleaners. Never combine vinegar with bleach or with any other cleaner. Use one product at a time, and rinse thoroughly between different products.
Forcing a shower head apart. If it will not unscrew easily, leave it attached and clean it in place.
Using sharp objects in the nozzle openings. Pins, needles, and knives can damage the holes.
Assuming stronger or longer soaking is always better. More contact time does not necessarily mean better results, and it can raise the risk of damaging the finish.
Forgetting to rinse cleaner residue. Run water through the shower head afterward so no soap or vinegar is left on the surface or in the openings.
How Often Should You Clean a Shower Head?
There is no single schedule that suits every home. How often you need to clean depends on a few things:
Water hardness. Areas with hard water may see mineral deposits form faster.
Visible buildup. White crust or residue around the nozzles is a clear sign it is time.
Changes in water flow. A weaker or uneven spray can point to blocked openings.
Bathroom conditions. Heavy use, humidity, and soap residue can all affect how quickly buildup appears.
A practical approach is to wipe the exterior during your normal bathroom cleaning and do a deeper cleaning whenever mineral deposits become noticeable. If you are already cleaning other appliances and fixtures around the home, such as following our guides on how to clean a dishwasher or how to clean a washing machine, the shower head is a good addition to that same routine.
Quick Maintenance Between Deep Cleanings
Small habits can make deep cleaning less frequent and less demanding.
Wipe away visible residue with a soft, damp cloth.
Gently rub flexible nozzles with a fingertip now and then.
Dry the exterior when convenient to reduce water spots.
Deal with visible mineral buildup before it becomes heavy.
Follow the manufacturer's care instructions for your specific shower head.
FAQ
Can you clean a shower head without removing it?
Yes. You can wipe the exterior, gently rub flexible nozzles, and use a soft brush with mild soap and warm water while the shower head stays attached. If the manufacturer and finish allow vinegar, the plastic-bag method is an optional extra for stubborn mineral buildup.
Can you clean a shower head without vinegar?
Yes. Warm water, mild dish soap, a soft cloth, and a soft brush work for routine cleaning and are often the best starting point, especially if you are unsure about the finish.
Is vinegar safe for every shower head?
No. Vinegar is acidic, and it can damage or discolor some finishes and materials, particularly coated, painted, matte, brass, or other specialty surfaces. Check the manufacturer's care instructions before using it.
How do you clean the small holes in a shower head?
Use a soft toothbrush with mild soap and warm water, working gently around each opening, and rub flexible rubber nozzles with a fingertip. Do not use needles, pins, knives, or other metal objects, as they can damage the openings.
What causes white buildup on a shower head?
White, chalky buildup is typically mineral deposits left behind as water evaporates. It can appear more quickly in areas with hard water, and soap residue can add to the look of it.
Can you leave a shower head soaking in vinegar overnight?
This should not be treated as universally safe. The right contact time depends on the material, the finish, and the manufacturer's guidance. Shorter soaks with periodic checks are generally more cautious than an overnight soak, and some finishes should not be soaked in vinegar at all.
Final Thoughts
Cleaning a shower head does not need to be complicated. Start with the gentlest method, which is usually a soft cloth, warm water, and mild dish soap. Check the material and finish before you reach for vinegar or any other cleaner, and use the manufacturer's instructions whenever you can find them. Stronger or longer cleaning is not always better, and with a little regular upkeep, many shower heads never need more than a quick, gentle wipe-down. The same go-gentle approach works well on other household jobs, such as when you clean a couch.
